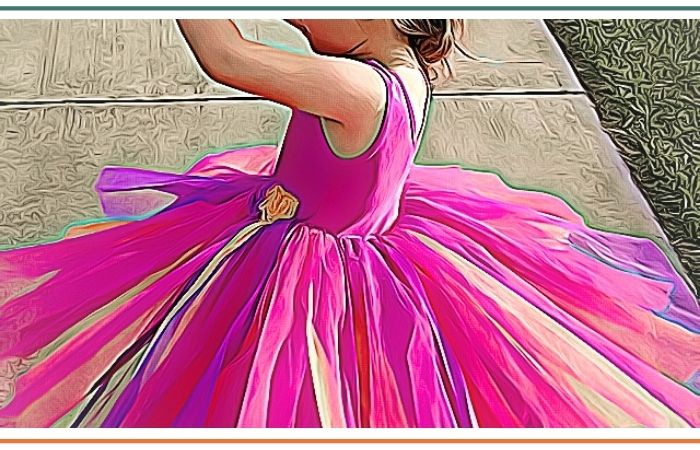
Tutus are a fun costume piece that little girls love. When you make a homemade tutu, it can also help boost confidence in your child; she’ll feel like a princess!
Imagine the sheer delight on your child’s face as they twirl around the room, their very own homemade tutu floating in the air. The sense of pride and joy that come from watching your little one light up with every spin is a feeling that stays etched in your heart forever.
Not only does this creative endeavor spark your child’s imagination, but it also fosters a deeper connection as you work side by side, creating something beautiful together. It’s an opportunity for them to express their artistic flair and for you to share in their joy.

Directions For Homemade Tutu

In this blog post, we will guide you through the step-by-step process of crafting a beautiful homemade tutu with your child. Oh, the magic and enchantment that await as you transform yards of tulle into a flowing masterpiece that captures their imagination!
What You Will Need
- Tulle fabric in your favorite colors
- Scissors
- Elastic band (about 1 inch wide)
- Measuring tape or ruler
- Needle and thread or a sewing machine
- Ribbon or additional embellishments (optional)
- Safety pins (optional)
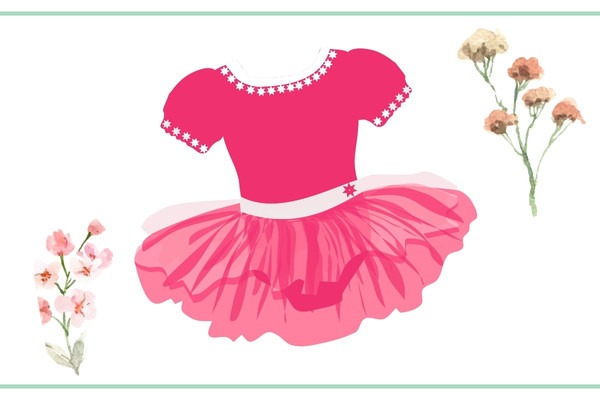
Step 1: Measure And Cut Your Tulle
First things first, let’s measure and cut the tulle fabric for your tutu. Using your measuring tape or ruler, decide how long you want your tutu to be. Measure from your waist down to your desired length. Add a few extra inches for tying knots and for the elastic band.
Cut several strips of tulle that are double the length you measured. You can choose to have all one color or mix different colors for a vibrant and stunning look. Remember, the more strips you cut, the fuller and fluffier your tutu will be!
Step 2: Prepare The Elastic Waistband
Now, let’s create the waistband for your tutu. Measure your waist or the waist of the person who will be wearing the tutu. Cut the elastic band about an inch shorter than the waist measurement.
To secure the ends of the elastic band together, you have two options. You can either sew the ends together using a needle and thread, or use a sewing machine for a more durable finish. Make sure it forms a comfortable but snug fit around your waist.
Step 3: Attach The Tulle To The Elastic Band
It’s time to attach the tulle strips to the elastic waistband! This is where the magic happens. Take one tulle strip, fold it in half, and loop it around the elastic band. Pull the tulle tightly through the loop formed by the fold and the halfway point. This will create a knot around the elastic. Repeat this step with the rest of the tulle strips until the elastic is covered all the way around.
You can choose to tie all the knots close together for a denser look or leave some space between the knots for a more airy tutu. Get creative, experiment with different colors and lengths, and make your tutu uniquely yours!
Step 4: Fluff And Adjust
Once you’ve attached all the tulle strips, it’s time to give your tutu some volume! Gently fluff each tulle strip, separating the layers to create a full and fabulous tutu. Take a step back, twirl around, and enjoy the ethereal beauty of your creation.
If you find that the tulle is not sitting evenly or there are gaps, don’t worry! Simply adjust the knots on the elastic and distribute the tulle strips to achieve your desired look. Safety pins can also be used to temporarily secure any loose or uneven strips until you’re happy with the final appearance.
Step 5: Customize And Embellish (Optional)
Now comes the fun part—putting your personal touch on your homemade tutu! You can add a ribbon to the waistband to give it a lovely bow or attach any other embellishments of your choice. Get creative with glitter, sequins, or even fabric flowers. This is your chance to let your imagination soar and make your tutu shine!
Step 6: Show Off Your Homemade Tutu!
Congratulations, fabulous fashionistas! You have successfully created your own homemade tutu. Now it’s time to put it on and let your inner dancer shine! Wear it for a special occasion, a playtime fashion show, or even just an afternoon twirl in the park. You’re sure to turn heads and feel like a true prima ballerina.
Creating a homemade tutu is a fantastic way to showcase your creativity, style, and love for dancing.
With just a few simple materials and a touch of imagination, you can craft a stunning ballet-inspired skirt that will make you feel like a superstar. So gather your supplies, let your inner designer bloom, and dance your heart out in your marvelous homemade tutu!
Remember, there’s no right or wrong way to make a tutu. Feel free to experiment with different colors, lengths, and embellishments. Every tutu is as unique as the person wearing it. So embrace your individuality, have fun, and enjoy each graceful moment in your own magical tutu creation!
Too Busy To Make A Homemade Tutu …
Try Jeowaqao Girls Tutu Set
Jeowoqao Girls Tutu Set – This adorable tutu kit is perfect for your toddler girl. With 5 colorful tutus and 5 flower hairpins, your little one will twirl and dance like a princess. Not only is it cute and fun, but it also offers developmental benefits. Dressing up and pretend play will help your little girl’s imagination. And It promotes fine motor skills as they put on the hairpins and twirl around in their tutu.


