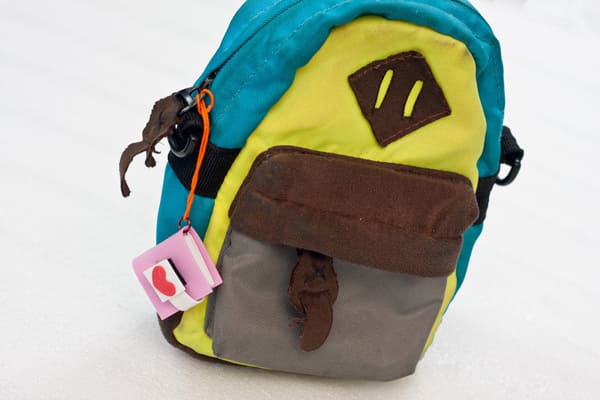

Valentine’s Day is fast approaching, and we know what that means … time to get crafting. Whether you have a young kid or an older teen at home, this Valentine Book Miniature keychain is just the right size to sprinkle a little love!
And let’s be honest: even if your Valentine isn’t into tiny things, this keychain is cute. Use it on your house keys or any bag you want to jazz up. Plus, it makes a great conversation piece!
How To Make Valentine Book Miniature Keychain
Today we’ll be showing you how to make this awesome keychain. It’s easy to make and looks really cute.
Plus, it’s small enough to fit in your pocket or purse! You can even attach it to your keys, so they always have something sweet to look at when they unlock their door.
We all know someone who loves collecting miniature items—they’re out there! If you’re dating one of them, don’t fret about getting the perfect gift this year. Instead, make your own Valentine’s Day gift with this tutorial.
What You Will Need
- pink, white and red sponge paper
- copper wire
- a small piece of black Velcro
- crochet thread
- round long nose pliers
- diagonal cutting pliers
- a pair of scissors
- hot glue
I have included recommended supplies to help your crafting experience. Some of the links below are affiliate links. This means that, at zero cost to you, I will earn an affiliate commission if you click through the link to complete your supply list.
Directions For Valentine Mini Book Keychain
Step 1: Gather the materials needed

Step 2: Cut a small rectangle from the pink sponge paper

The dimension of this should be at least 4 centimeters long and 2 centimeters wide.
Step 3: Cut a white strip of felt

Cut a strip of white sponge paper that is at least 2 centimeters wide.
Step 4: Cut it into three pieces

Cut the strip into three pieces of 3.5 to 4 centimeters long for each.
Step 5: Fold the three white rectangles equally

Step 6: Cut a small, thin strip of pink sponge paper

Align the three folded white sponge papers together and glue the thin pink strips on the folded parts of the whites.
Step 7: Add the pink sponge for a book cover
Wrap and fold the pink rectangle sponge paper on the folded white sponges equally. Use the short, thin strip from the former step as a reference to the middle part of the mini-book.
Step 8: Cut a white square of felt

Cut a small white square that is about 1-centimeter by 1-centimeter in size.
Step 9: Add a heart
Cut a small heart from the red sponge paper and glue it on the middle of the small white square.
Step 10: Cut a very thin strip of white sponge paper
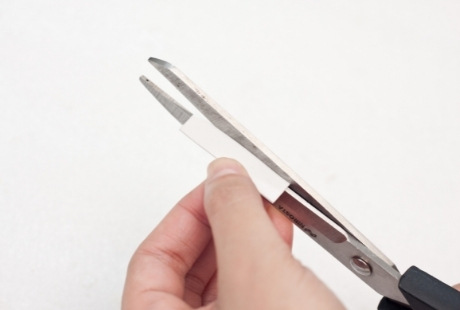
The dimensions of this should be at least 2 to 3 centimeters long and a ½ centimeter wide.
Step 11: Combine the heart and the book
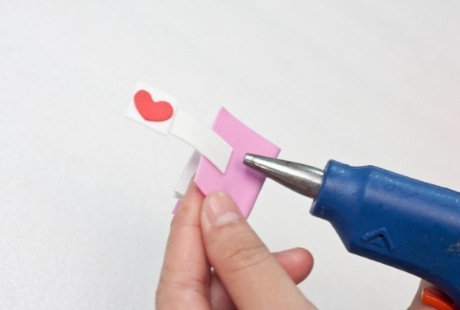
Glue the white square with the heart on one end of the thin white strip. Glue the free end or the opposite end of the strip to the back, middle part of the miniature book. This should be placed on the back opening cover of the book and should perfectly fit when the square heart is folded towards the front face of the book.
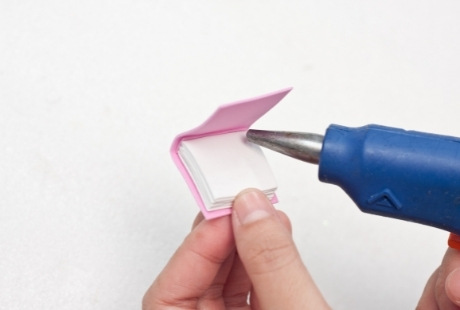
Step 12: Add Velcro
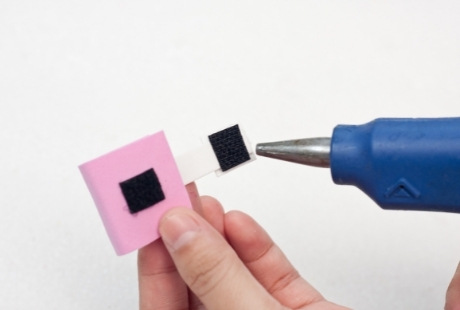
Cut a small piece of black Velcro that would fit the think white strip. Glue the Velcro in the middle of the book’s front face and the other piece on the end of the white, thin strip.
Step 13: Bend the copper wire into a circle

Create a small circle from the copper wire using the round long nose pliers.
Step 14: Insert the copper wire

Insert the circular wire on the topmost part of the miniature book on the base bind of the book itself.
Step 15: Add the crochet thread

Cut at least 5 centimeters long crochet thread and insert this on the circular wire. Create a loop at the ends of the thread.
Step 16: Done and ready to be placed on the bag zipper!

You have the option to use a keyring instead of using a crochet thread as a hanging device for this cute miniature keychain. This is a cool gift especially if your other half loves collecting miniature objects or items.
Otherwise, this can be used on any bag or even on house keys, given that you will use a key ring for this. Hope you liked it!
RELATED TOPICS
Smart Arts And Crafts For Kids: A Parent’s Guide To Creative Fun


