Every young person needs fun teen crafts or activities. The adolescent years can be a challenging time for many young people. And sometimes too much time and peer pressure can cause problems.
When it comes to teenagers, many are hard to please. They are at an age where they easily lose interest in activities meant for younger children.
But fun teen crafts can add a new twist for older kids.

If you are the parent of a teen, especially one that will be spending their summer break at home, try something new. Familiarize yourself with teen crafts that are specially designed for their finicky personalities.
The right hobby or activity can help your teenager to learn a new skill as well as stay entertained for hours.
Some kids might think of video games or TV as an appropriate kid hobby, but most parents would like to see their kids doing something more challenging or educational.
This is a list of teen crafts created just for young adults …
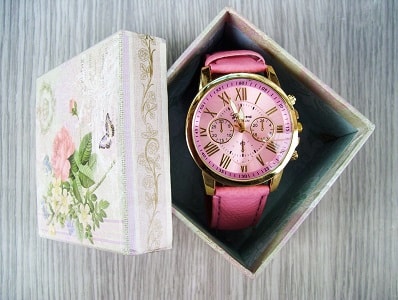
1. Beaded Necklace

Another craft your teen may like, particularly if they’re girls, is to learn how to make jewelry.
Most teen girls love jewelry. You can find pretty jewelry making kits at most craft stores. You can also find individual beads, wire, and other items needed to make jewelry rather than buying a kit. Help them pick out the beads to include on their first ‘designer’ piece.
There are lots of ways to make necklaces, but one of the easiest and most creative ways is simply with thread and beads. Here’s how.
What You Will Need
- Spool of upholstery thread (this is thin but strong)
- Small sewing needle
- Beads, seed beads, and other sizes
- Needle-nosed pliers
- Necklace clasps (optional – necessary only if the necklace is too small to go over the head)
Directions
-
First, decide on a design – You may want a central “pendant” or large bead, or perhaps just random beads along the thread. When you’re working with a central pendant, the key is to mirror the beads on either side of the pendant so that they look symmetrical on either side. The best way to do this is to layout the design on the floor or table first.
-
Thread the beads – Next, thread the needle with upholstery thread in whatever length you want the necklace to be. Then, poke the needle through the holes in the beads and string them in your chosen order, starting with the end beads, not the central one(s).
-
Count the beads – If you are using seed beads to space between larger beads, be sure to count each one so the spacing is even. If some beads are too small to fit over the needle, use the pliers to coax them over.
-
Finish off the ends – When finished, tie the threads off or attach the necklace clasps.
2. CD Headband
A headband is an accessory that is normally worn around the forehead. Aside from being fashionable, it is also used to hold the hair away from the face, especially if it really bothers you most of the time. Headbands can be made from a soft cloth, plastic or even metal.
This headband is very cheap to make because it is constructed from used or broken compact discs. So before you throw your broken compact disc from your shelves, why not try making a fashionable headband from it. Sounds fun, right?
What You Will Need
- a piece of soft craft felt (purple)
- a thick plain plastic headband
- piecea of a broken compact disc
- hot glue
- a pair of scissor
Directions
-
- Stick the soft craft felt on the outermost part of the plastic headband using hot glue. This will cover the main body of the headband.
- Cut the excess craft felt on the sides of the plastic headband.
- Randomly cut the broken compact disc into pieces.
- Hot glue the CD pieces onto the surface of the headband.
- Continue gluing the CD pieces until you cover the whole surface of the plastic headband. Let it dry for a while to ensure that the CD pieces will fully adhere to the headband surface.
Finished! You can now wear your fashionable headband made from a broken compact disc!
Before using this fashionable headband, it is better to wipe the CD pieces first using a flannel cloth or a smooth cloth. This will give a shiny finish to the headband and it will make this headband stand out from others. You can also use other colors of the craft felt like the main body of the headband. Great color choices include black and red since these colors are very versatile and work with lots of clothes.
3. Paint A Wall Mural

This teen craft is a fun activity that your young adult can do with her friends. If she has a large area in her room or family you can can allow to express her personality.
What You Will Need
- Pencils
- Acrylic paint (different color
- White paint
- Different size paint brushes
Directions
- Draw an outline on the wall – You can draw a design or use a projector first to cast the image on the wall, trace it out and then hand paint it. A projector is very helpful to maintain the correct proportions and to help in the placement of the object.
- Make a small collection of paint colors. – You can use acrylic paint from a craft or hardware store. Both of these mediums dry quickly and clean up easily with water. If you want to save a few dollars, you can purchase a gallon of extra bright white paint and mix it with the acrylic colors.
- Paint a clear outline Start with dark paint and add a dark outline and let it dry. This will prevent it from bleeding into other colors.
- Fill it in with bright color – Use a variety of bright colors to fill inside the dark outline. And you can add lighter colors for a background scene.
- Paint a clear coat of polyurethane over it to protect it – After you are done, paint a clear coat that will not yellow with age. The clear coating allows cleanup in case of dirt or fingerprints.
4. Italian Photo Charms

Photo charm bracelets are sold as a kit and your teen can add her own photos. They are very easy to make and come in sizes and styles. Hearts, circles, squares, large or “mega” charms, photo charm necklaces, and more.
What You Will Need
- A kit that includes everything needed to make a completely customized photo bracelet at home for less than $20
Directions
- Collect photos and resize them – Use easy photo charm resizer software to resize your photos.
- Print them out – Print out photos on any color printer after reading easy to follow instructions on resizing and printing.
- Cut photos to fit – After cutting out your perfectly sized pictures you will attach the pictures to the charms with bonding glue. The charms you will be using have a raised frame on top and are designed for making photo charms.
- Use a photo charm kit for easy results – Mix special coating in included cups and apply to charm. In as little as 24 hours they are dry and ready to wear and impress your friends.
5. Design Custom Shoes

Footwear can be fun if your teen makes custom shoes! This teen craft can work with young and old alike. There are a couple of approaches to customizing your shoes; you can decorate existing shoes or actually make a pair.
What You Will Need
- White canvas shoes
- Permanent markers
- Fabric or acrylic paint
- Paintbrushes
Directions
- Start with a clean surface – Use soap and water to thoroughly clean the shoes or start with a new pair.
- Use acrylic paint to customize shoes – Canvas shoes especially lend themselves to being painted.
- Paint a simple pattern – Try a simple flower pattern (small yellow dot surrounded by larger, colored dots), or polka dots. Simply making colorful dots along the band and edge of a pair of Mary Janes gives them a new look.
- Let it dry – Make sure the material dries completely so the paint doesn’t smudge.
6. DVD Bracelet
DVDs (digital video discs) were developed by big companies in 1995 as an upgrade to VHS (video home system). Broken DVDs are commonly used as a decorative material because of the brilliant effect of the backside when illuminated.
This is a very cheap material to produce an elegant looking bracelet that can be worn in special events. Nobody would recognize that you are just using a bracelet made from simple materials. So if you are thrilled with the idea, then let us begin crafting this one!
What You Will Need
- a piece of black craft felt
- black Velcro
- a piece of broken DVD
- a pair of scissors
- hot glue
Directions
-
- Cut a strip of black craft felt that is at least 3 centimeters in width.
- Measure the black strip on your wrist. This length would be based on your own liking. Cut the excess strip.
- Cut the broken DVD in several random shapes.
- Hot glue the broken DVD pieces on the black strip. Make sure to have some spaces in between to give a better effect. Continue gluing the broken DVD pieces until you cover the entire black strip. There should a blank space on one end of the black strip for the allotment of the Velcro adhesive later on.
- Cut a small piece of Velcro adhesive based on the space provided on the black strip.
- Hot glue the Velcro on the ends of the bracelet.
- Try the bracelet on and make the necessary adjustments if needed.
Finally done! You now have an elegant bracelet from a broken DVD! This elegant bracelet looks like an expensive bracelet that is usually sold in jewelry shops. Make sure to wipe the DVD pieces before you use it to ensure the smoothness of the DVD surface, giving you a more premium look. Who says you can’t have such elegant looking bracelet without spending that much?!
7. Decorate A Keepsake Box
Boxes provide interesting results when done with decoupage. A variety of boxes are available in craft stores.
What You Will Need
- Empty cardboard box with a lid, such as a shoebox
- Decoupage medium (such as Mod Podge, found at craft stores)
- Assorted Magazines and catalogs that your child can cut
- Paintbrush
Directions
- Create a design –Your child can make this a free design, like a collage, or cut pictures with square edges to make a more tailored look.
- Apply decoupage – Once he or she has decided on the design, the decoupage medium can be applied under and over the cut-out designs.
- Let it dry -You know it is ready when it is firm to touch.
SMART TIP: Your decoupage box should be given two or three thin coats of an oil-based paint as a base and at least three coats of varnish to finish. The final coat can be rubbed with dampened emery cloth for a fine, soft, matte finish.
8. Create A Scrapbook Page

Scrapbooking is a great activity your teen can do when cold weather strikes. When the winter is over, your teen could have a scrapbook they’ll be proud to show off to their friends.
What You Will Need
- Your teen’s favorite photos
- colored cardstock for the cover
- lyrics to songs
- photos from magazines, postcards, greeting cards or collector cards
- stickers
Directions
- Start with a blank canvas. – you can either use white cardstock as your base, or full sheets of scrapbook paper.
- Use a piece of colored cardstock for the cover.
- Put pages together – Punch three holes in the side of the cardstock and then add pages. Another idea for kids is to use homemade albums versus store-bought albums.
- Tie them together – Use ribbon through the holes to tie it all together. Not only do the kids love these scrapbooks but they can make wonderful handmade gifts to give to others.
- Add stickers for decorations – Kids and teens both love stickers. They add personality and unique touch.
Smart tip: Always watched for sales on stickers. Over the years we have bought more than our fair share of stickers.
9. Make A Fragrant Candle
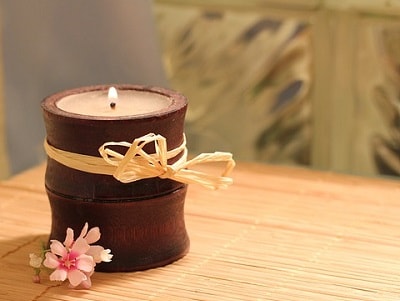
A candle, consisting of an internal wick and a column of solid fuel is great to light up a dark area. Different varieties of candles have flooded the market. The candles are of different colors, aromas, and shapes.
What You Will Need
- paraffin wax,
- melting system,
- candy thermometer scales to measure
- ladle and spoons are used for stirring and pouring wax.
- chemically treated wick that burns for a longer period of time
- stearic acid – since wax is soft, is used to make it solid.
- color dyes – to make the appearance brighter
- containers, it is best to use a heat resistant glass.
Directions
- Suspend a wick in the center of the mold.
- Dissolve stearic acid and color dye in a container and heat the wax to 190 degrees.
- Combine the stearic mixture with paraffin and stir it continuously to blend it.
- Different colors can be mixed together to form a new color according to your taste.
- The oil-based liquids; pellets and wax solids are the sources of scent. It has to be added before pouring the candle to avoid evaporation.
- Pour the mixture into a mold, allow time for it to cool. Then remove it from the mold.
10. Decorate A Custom Cake

Cake decorating is an art, but luckily it is one you can learn with some practice.
Chances are you’re not interested in creating elaborate cakes like those on television but you would like to learn something more than merely frosting a cake.
What You Will Need
- Pastry bag with plastic couplers
- Decorating tips in assorted shapes
- Offset and straight icing spatulas
- Food coloring to tint icing
Directions
- Make a dozen cupcakes – Make 12 – 14 cupcakes from a cake box or your favorite recipe. I don’t judge.
- Find the right decorating tips – Decorating tips come in a variety of shapes and sizes. Cupcake decorating is matter of practicng with different tips.
- Fill the pastry bag – The pastry bag is the container used for icing.
- Attach the right tip to the best pastry bag for icing – Attached to the bag is a plastic coupler which enables you to change decorating tips. Scoop icing into the pastry bag with a spatula but don’t overfill it
- Add the icing to the cupcake. Apply pressure to the pastry bag and squeeze a large amount to the top of the cupcake. The tips will do most of the work.
- Let it set in – Place the finished cake in a cool place the refrigerator so the icing keeps its shape.
If your teen is serious about cake decorating you’ll want to invest in the metal tips. They can be found in different shapes including round for piping and detail outlining, leaf, drop flower, ruffle, basket weave, rose and various specialty tips.


