Stem activities for kids will inspire your child to reach for the moon.
Using science and math, your child can create crafts that are simple, challenging, and inspiring them to learn new skills.
All children are ready for school at different ages and they learn at their own pace. But fun science experiments are thrilling to most kids.
Fun Stem Activities For Kids That Are Challenging
Even if your child does not do well with good at math or science, STEM activities for kids help to develop critical thinking skills.
They will learn coordination, counting, reading, and how to follow simple directions. The amount of skills they learn is depending on what they are making.
But there are some basic skills that every child will need to know
Science experiments are excellent tools that help them learn to make marks that are both curvy and straight.
I like to encourage my children to make STEM activities for kids and think out of the box. They have even used simple kitchen ingredients to make new color combinations. And thankfully, under proper parental supervision, they have not blown anything up .. Yeah for my family.
These are simple STEM activities for kids that will get them ready to explore the world around them.
1. Make a Cute Binocular Toy
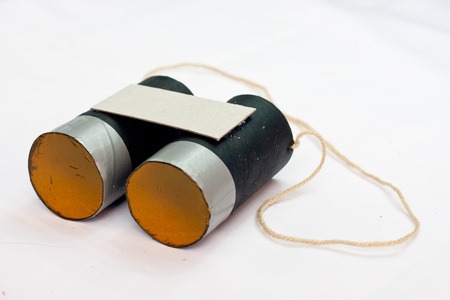
Boys love playing military games. They love to play as military men and to complete the whole idea, one must have a pair of toy binoculars. Binoculars aid us in viewing far away objects. This binocular toy is a hit for kids of all ages. It’s perfect for military games.
What You Will Need
- 2 pieces of toilet paper roll
- yellow cellophane
- a piece of cardboard
- yarn
- black acrylic paint
- paintbrush
- scissors
- white glue
- silver duct tape
- hot glue
- short, pointed scissors (any pointed object)
- a cotton ball
- a small amount of water
Directions
- Paint the paper rolls – Paint the two toilet paper rolls with black acrylic paint. Double coat it if needed. Let the paint dry for an hour.
- Cut two squares from the yellow cellophane -This should be big enough to accommodate the diameter of the toilet paper roll hole.
- Attach cellophane – Glue the cellophane on one of the sides of each toilet paper roll.
- Cut the unnecessary cellophane – Make sure to leave a very small border around it. Cut two pieces of 2-centimeter-thick duct tape.
- Tuck and wrap – Tuck the excess cellophane and wrap the duct tape around as lining at the end of both rolls.
- Stretch the cellophane – Get a cotton ball soaked in water and smear it on the cellophane. This will stretch the cellophane, thereby creating a better view from the binocular.
- Let the cellophane dry for 10 to 20 minutes. – You will observe stretching of the cellophane once it dries up.
- Make a rectangle – Cut a small rectangle from the cardboard enough to bridge the two rolls.
- Make holes – Using a pointed object, make a hole on each of the sides of the binocular.
- Insert yarn – Cut the yarn based on the length that you desire. Insert the yarn on the hole and form a loop to secure it accordingly.
2. Large Magnets

What You Will Need
- Magnets
Directions
- Prepare the magnets. – Get a number of magnets to illustrate attraction and repulsion. Make sure they are large enough so a child can’t swallow them.
- Make a maze. – You can create a maze on a piece of paper or cardboard and place a metal object like a paperclip on top.
- Use the magnet. -Slide the magnet underneath to drive the paperclip through the maze.
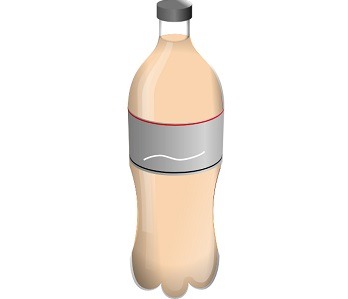
3. Coke Bottle Geyser
What You Will Need:
- 2 liter of diet cola
- Mentos candy
Directions
- Prepare Coke and Mentos – Get a 2-liter bottle of diet cola and a tube of mint Mentos candy.
- Go outside into an open space – Drop 7 Mentos into the bottle, preferable at the same time, and run away. Watch the soda shoot straight up out of the bottle like a geyser.
4. Invisible Ink

What You Will Need:
- half a fresh lemon
- water
- a cotton bud
- paper
- a lamp
Directions
- Prepare the liquid – Juice the lemon into the bowl and add a few drops of water.
- Add a message – Dip the cotton bud into the lemon juice and write a message on the paper.
- Let it dry – Wait for the juice to dry, so it becomes completely invisible.
- Show the secret ink – To amaze people with the secret message, hold the paper close to the lamp or the bulb. The heat will make the writing appear.
5. Pringles Can Mobile Speaker
This Pringles can mobile speaker will make a very inexpensive, upcycled mobile speaker. The volume of the mobile sound will improve by as much as 50% since the sound is tightly contained in the can
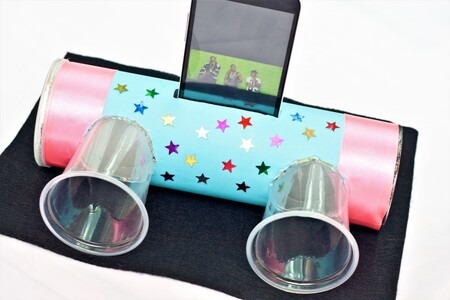
Smart Pringles Can Speaker
What You Will Need
- Pringles can
- 2 small plastic or paper cups
- Hot glue
- Cutter
- 5-inch thick pink ribbon
- Short-pointed scissors
- Black marker
- A piece of construction paper
- Small designing materials e.g. star, buttons, etc.
Directions
- Prepare – Gather all the materials needed for this project:
- Mark cup – Get one of the plastic or paper cups and using the bottom of it, make a mark on the Pringles can. Make two for both sides.
- Decorate it up – Cut the marked circles on the can. Wrap the whole construction paper around the Pringles can using hot glue.
- Attach the ribbons – Hot glue the pink ribbon on the side end of the can. And hot glue the pink ribbon on the opposite side as well.
- Make a small opening – Make one on the construction paper using a cutter, in reference to the hole that was made in step 3. Totally cut the circles on the paper using the short-pointed scissors.
- Fit the smartphone – Get your smartphone and place it on the mid-top part of the Pringles can. Use a marker to get the exact measurements of the mobile phone. Cut the marked part in step 9 so that the smartphone fits on the can perfectly.
- Remove the bottom part of the plastic cups. Insert the plastic or paper cups into the two holes. Hot glue the insertion point of the cups and the can to avoid sound leakage.
- Decorate the speaker can.
- Insert your mobile phone – check if it fits well. Make any necessary adjustments.
6. Homemade Volcano

What You Will Need:
- 1 tablespoon liquid dishwashing soap
- 3 drops red food coloring
- 1 cup vinegar
- 1 1/2 cups warm water
- 2 tablespoons baking soda
Directions
- Prepare items – You will need a 25-ounce plastic bottle with the top cut off wide enough to place the ingredients inside.
- Secure the bottle – Place the bottle on top of a flower pot and surround it with dirt so that it does not wobble. Gather the following ingredients:
- Add ingredients – Add the soap and food coloring to the bottle. Add the vinegar. Pour in the water and fill the bottle almost to the top.
- Add baking soda – Place the baking soda in a small cup and add a little of the water to it to moisten. Pour it into the bottle and step back. The contents will start to flow like lava out of a volcano.
7. Homemade Penicillin
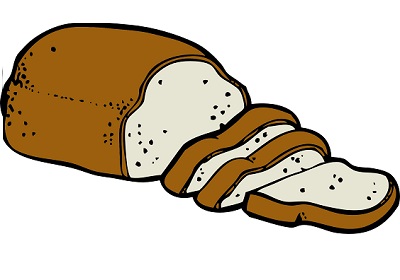
What You Will Need:
- Moldy bread
- Plastic bags
Directions
- Grow mold on bread by putting slices in different environments:
- In a plastic bag in the dark
- In plastic bag in the sunlight
- On a plate uncovered
- In the refrigerator
8. Homemade Slime

This fun, stretchy substance can occupy kids for hours.
What You Will Need:
- 1/4 cup of water
- 1/4 cup of white craft glue (like Elmer’s glue)
- 1/4 cup of liquid starch (used for clothes)
- Green food coloring
Directions
- In a mixing bowl, pour all of the glue and add the water. Stir well.
- Add about 6 drops of food coloring.
- Stir in the starch. The mixture will soon bulge and you can start to stretch it and shape it.
- Store in a plastic bag when you are not playing with it so it does not dry out.
9. Homemade Clouds and Rain
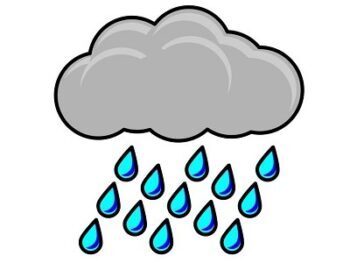
STEM activities for kids can really inform your kids about nature. This will teach children how clouds hold water and how when they become too heavy, it starts to rain. The colored water should make pretty patterns the kids will enjoy as well.
What You Will Need
- Water, colored with some food coloring
- A clear jar/glass/vase with water in it
- Shaving foam
- An eyedropper
Directions
- Make the cloud – Squirt some shaving cream on top of the water in the vase. That will be your cloud.
- Color the water – Pour the colored water into the vase carefully.
- Let it rain – It will start to rain under the “cloud” as the cream gets to the point where it can’t hold any more water.
10. Blowing Up a Balloon with Yeast

What You Will Need:
- A packet of active yeast
- A small, clean, clear, plastic soda bottle (16 oz.)
- 1 teaspoon sugar
- Some warm water
- A small balloon that will fit over the mouth of the bottle
Directions
- Add water, yeast, and sugar – Fill the bottle up with about one inch of warm water. Add the yeast and swirl the mixture around. Add the sugar next. The warmth activates the living organism, the yeast, and the sugar feeds it.
- Cover with the balloon – Now the yeast’s digestive system will start producing gas, which makes the dough rise. Place the balloon over the neck of the bottle and put the bottle in a warm place.
- Step back and watch – Within about 15 to 20 minutes, the balloon should start to inflate.
11. Experimental Mini Cakes

This will involve some waste but is a valuable lesson in how certain ingredients affect recipes, and how important it is to follow baking instructions carefully.
What You Will Need:
- 4 small greased ramekins for baking
- For each cake:
- 6 tablespoons flour
- 3 tablespoons sugar
- 1 pinch of salt
- 2 or 3 pinches of baking powder
- 2 tablespoons milk
- 2 tablespoons cooking oil
- 1/4 teaspoon vanilla
- 1/3 of an egg (Break egg into a cup, beat it, and use approximately one-third of it)
Directions
Make four different batches of batter, with a difference.
- Make cake #1 exactly as instructed. Label it 1.
- Make cake #2 exactly the same, except leave out the oil. Label it 2.
- Make cake #3 exactly the same, except this time, leave the egg out. Label it 3.
- Make cake #4 exactly the same, except leave the baking powder out. Label it 4.
- Bake all four cakes – Place the ramekins on a baking sheet, keeping track of which is which, and bake them in a 350 F oven for 15 to 20 minutes.
- Let it cool – Remove from the oven and cool briefly. Using a spoon, check the texture and taste of each cake. They can all be eaten, but eggs help hold recipes together and make them rise. Oil keeps cakes moist. Baking powder makes cakes rise.
12. Inflate Balloons With Pop Rocks

Pop Rocks are fun to eat because they snap and pop and fizz in your mouth. But you may not know that they can inflate a balloon, too, by releasing carbon dioxide trapped in a bottle of soda.
What You Will Need:
- 1 – 16 oz bottle of soda (any flavor will do)
- 1 pouch of Pop Rocks
- 1 balloon
- a funnel
Directions
- Pour pop rocks into the balloon. Use the funnel to pour the whole container of Pop Rocks into the balloon.
- Add the balloon to soda bottles. Twist the end of the balloon just a little so you’re holding the Pop Rocks inside the balloon while you stretch the end of the balloon over the top of the soda bottle. You don’t want the Pop Rocks to drop into the bottle before you’re ready to start.
- Release the balloon. Once the balloon is firmly in place on the bottle let it go.
- Step back and watch it pop. Let the Pop Rocks work in the soda and the balloon starts to inflate.
13. Bonsai Craft For Kids

Creating a bonsai brings some of the drama of nature to your home in miniature form. It’s not as hard as you’d think.
What You Will Need
- Two or three bonsai pots in various sizes
- Sharp pruning shears or cutters
- Potting soil
- Pea-sized gravel
- Coffee filter or sheet of newspaper
- Pruning scissors
- Trowel
Directions
- Pick the perfect plant. – Look for a thick, interesting trunk shape as you search for your specimen.
- Collect the whole plant. – Gather up the seedling from the wild using a trowel, keeping as much dirt around the roots as possible or purchase your potted shrub.
- Trim the roots (take away 1/3 of the roots) and put the bonsai into a pot.
- Prepare the pot – Cut squares from a coffee filter or newspaper and place them over the hole(s) in the bonsai pot; then cover the bottom of the pot with gravel, then some soil.
- Place the root-trimmed plant into the pot. and cover the roots with soil.
- Trim the foliage – Cut back the foliage and branches of the top into an attractive shape.
- Water regularly, – Feed, water, and trim to shape over the season and years.
14. Terrarium

Few STEM activities for kids teach children so much about how an ecosystem works than a terrarium. And it gets better – you can teach your kids about recycling at the same time by planting your terrarium in a used 2-liter plastic bottle.
What You Will Need
- Empty 2-liter plastic bottle
- Small pot or container that will fit inside the bottle
- Pea-sized gravel
- Potting soil
- Assorted plants or seeds
- Scissors or sharp knife
Directions
- Cut the bottom of the bottle – Using the scissors or knife (a serrated bread knife works best), cut the bottom off the bottle.
- Place some gravel in the bottom of the container for drainage. Then add the soil and plant the plants or seeds.
- Water your seeds or plants well – Water well and then place the top of the bottle over the container.
- Add fun designs. – For fun, let your kids put tiny figurines or houses in the dirt around the plants (if using seeds, these fun additions can be added later).
- Place in sunny spot. – Cap the bottle and place it in a sunny spot.
15. Home Kazoo
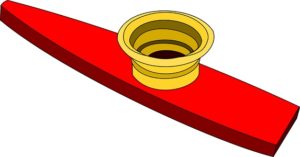
What You Will Need
- an empty toilet paper tube,
- wax paper,
- a rubber band and
- a pair of scissors.
Directions
- Cut wax paper. Measure a piece of wax paper that’s large enough to cover one of the ends of the toilet paper roll.
- Attach wax to toilet paper roll. Fasten it to one of the ends of the roll with the elastic band.
- Add a hole. With the end of your scissors, make a small hole in the roll close to the end that is covered with wax paper.
- Blow into the kazoo. To play the kazoo, you just hum into the open end and enjoy the music.
16. Candle From Old Crayons

If you have children in your home, chances are you have an abundance of worn-down crayons. Before throwing them out, consider using them to make candles.
What You Will Need
- crayons, you will need
- a wax cartoon – it can be milk, fabric softener, or orange juice.
- paraffin wax
- two full ice cube trays
- a double boiler, and white packing string – or an old coffee can and a saucepan
- non-flammable holders. Pretty vases, glasses, and jars work nicely.
DIrections
- Trim the top off of the wax cartoon. Leave it approximately six inches high. You will want to cut the string at least 8 inches long. You will later cut the wick to fit the holder. To ensure a wick that burns easier take three pieces and braid them together. Use smaller pieces of string to tie the ends together.
- Melt wax. Melt about three pounds of paraffin wax in the double boiler or coffee can. To help it melt faster, cut it into small chunks. The melting process take about fifteen to twenty minutes.
- Peel crayons. While the wax is melting, peel the papers from the old crayons. You can separate the colors by lights or you can mix it all together and see what happens. For best results, only add the crayons to the wax after it has completely melted.
- Pour into candle holders. After the crayons and wax have both melted together, remove the mixture from the stove, and pour into candle holders. To make scented candles try adding a splash of cinnamon or vanilla to the hot wax mixture.
- Let candles get hard. It is important that the candles by left alone to completely harden.
More Tips On Stem Activities For Kids That Are Fun
STEM activities for kids will prepare your kids for when they will have to combine science, math and some creativity. With a little imagination, the kids can even come up with their own experiments. And the best part? Your kids won’t even know they’re learning stuff on their vacation.
There are an endless amount of online STEM activities for kids of all ages to do. And these few tips can tap into stem activities for your child.
- Make it practical – Science extends far beyond the classroom. Explain fractions and chemical reactions while you’re doing your grocery shopping or baking a cake.
- Appeal to your child’s interests – There can be a technological dimension to any subject that your child loves. Talk about how video replay systems work while you’re watching a sports game. Explain how musicians use computers to edit music.
- Encourage hands-on learning – You can spark children’s interest by engaging them in fun activities. Many interesting science experiments require nothing more than ordinary objects you have in your kitchen cupboards or garage.
As a parent, you can do some research to find the right websites for your children’s age. If your kids are of school age, your teacher will also have a website with links to fun games and activities for their level.
Many organizations produce STEM materials to share with your kids, including games and videos. Visit PBS, the National Geographic Society, and NASA for starters.


