Who would have thought that those penne, rigatoni, and macaroni in your pantry could become a dazzling array of eye-catching accessories? Say goodbye to plain old pasta and hello to the world of pasta bead necklaces, where artistry and imagination run wild.
This DIY pasta bead necklace does not require any glue or other fancy materials. If you have any pasta left over in the pantry, this is a great way to recycle them into something beautiful!

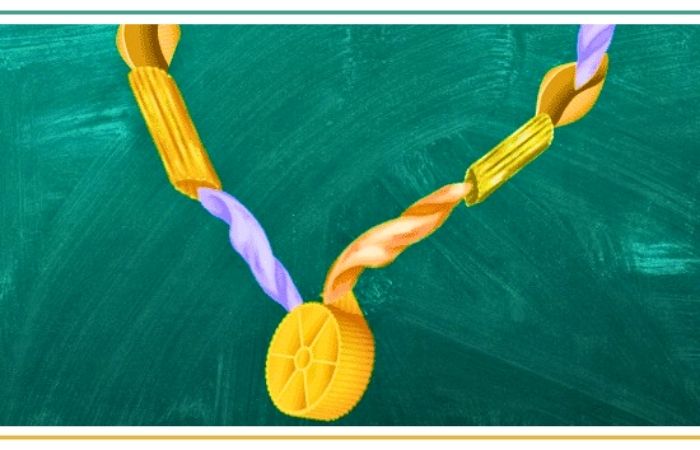
Directions For Pasta Necklace

Did you know that your kitchen cupboards and pantries can be a great source of DIY necklace beads? So, gather up your pasta, find some colorful string or yarn and join us as we guide you step-by-step through this exciting journey.
What You Will Need
- Uncooked pasta (penne, ziti, or rigatoni work well)
- Food coloring or liquid watercolors
- Rubbing alcohol or vinegar
- Plastic zip-top bags
- String or yarn
- Scissors
- Optional: acrylic paint, glitter, markers, or stickers for decoration
Step 1: Color Your Pasta Beads
First things first, let’s bring some color to our pasta beads! Grab a plastic zip-top bag and add some uncooked pasta to it. You can choose to color a few beads or a whole batch, depending on your design preference.
Add a few drops of food coloring or liquid watercolors to the bag. You can use one color or mix different colors to create a vibrant and eye-catching necklace. To help the color spread evenly, add a small amount of rubbing alcohol or vinegar to the bag. Seal the bag tightly and shake it gently to coat the pasta beads with the color mixture.
Step 2: Dry And Set Your Pasta Beads
Once your pasta beads are all colorful and covered, it’s time to let them dry and set. Spread out the damp beads on a paper towel or a tray in a single layer. Make sure they are not touching each other to prevent sticking.
Let the pasta beads air dry for a few hours or overnight. This will allow the color to set and the beads to harden. If you’re in a hurry, you can also place the beads in a low-temperature oven for about 10-15 minutes to speed up the drying process. Just be sure to ask an adult to help you with this step.
Step 3: String Your Pasta Beads
Now that your colorful pasta beads are dry and ready, let’s turn them into a beautiful necklace! Cut a piece of string or yarn to your desired necklace length. It could be long, short, or somewhere in between. It’s your necklace, so you get to decide!
Start by tying a knot at one end of the string to prevent the beads from sliding off. Thread the other end of the string through the holes of your pasta beads one at a time. You can alternate colors, create patterns, or let your imagination run wild and thread them randomly.
To secure the necklace, tie a knot at the end of the string after all the beads are threaded. Make sure it’s big enough to prevent the beads from slipping off but not too tight to restrict movement.
Step 4: Add Your Creative Touch (Optional)
Now that your pasta bead necklace is taking shape, it’s time to add your own creative touch and make it extra special. You can use acrylic paint, glitter, markers, or stickers to decorate the pasta beads further. Let your imagination guide you as you turn your necklace into a unique work of art!
You can also add other decorative elements like small charms, beads, or even small pasta shapes that haven’t been colored. Get creative and personalize your necklace to reflect your style and personality.
Step 5: Showcase Your Masterpiece
Congratulations, little artists! You have successfully created your very own pasta bead necklace. Now it’s time to show it off to the world! Wear it proudly to a special occasion, a playdate, or simply as a fashion statement when you’re feeling extra crafty.
Tips On Making Pasta Necklace
Creating pasta bead necklaces is an exciting and imaginative activity that allows you to express your artistic side while also showcasing your crafting skills. With just a few simple materials and a pinch of creativity, you can turn ordinary pasta beads into stunning jewelry pieces that reflect your unique style.
You can even make more pasta bead necklaces and share them with friends and family as a thoughtful handmade gift. Spread the joy of crafting by hosting a pasta bead necklace-making party and inspire others to unleash their creativity.
Remember, there’s no right or wrong way to make a pasta bead necklace. Let your imagination soar as you experiment with different colors, shapes, and decorations. Each necklace you create will be as special and one-of-a-kind as you are.
Too Busy To Make A Pasta Necklace ..?
Try PinkSheep Kids Jewelry for Girls

PinkSheep Kids Jewelry for Girls – This adorable set of beaded necklace and bracelet is perfect for your little princess. Made from high-quality materials, it is safe for your toddler to wear and play with. Not only does it make a great gift, but it also offers developmental benefits. Wearing jewelry like this enhances your child’s fine motor skills and hand-eye coordination as they fasten and unfasten the clasp. It also encourages imaginative play and self-expression.


