Get ready to slither into a craft adventure with your kids as we show you how to create a mesmerizing Paper Chain Snake!
Now, let me share a little story about my own mischievous kids. Last summer, they were obsessed with snakes! They watched snake documentaries, collected snake toys, and even dressed up as snakes for Halloween. So, I decided to surprise them by making a paper chain snake with them.
Believe me, the joy on their faces was priceless!
Not only did we have a delightful time crafting together, but it also encouraged their creativity and helped improve their fine motor skills. Plus, it became a treasured decoration in their room, adding a touch of adventure to their space.
Directions For Paper Chain Snake
Join me on this instructional blog post where we will walk you through the steps of creating a captivating paper chain snake. With simple materials and a pinch of creativity, you’ll have a wiggly companion to decorate your space.
What You Will Need
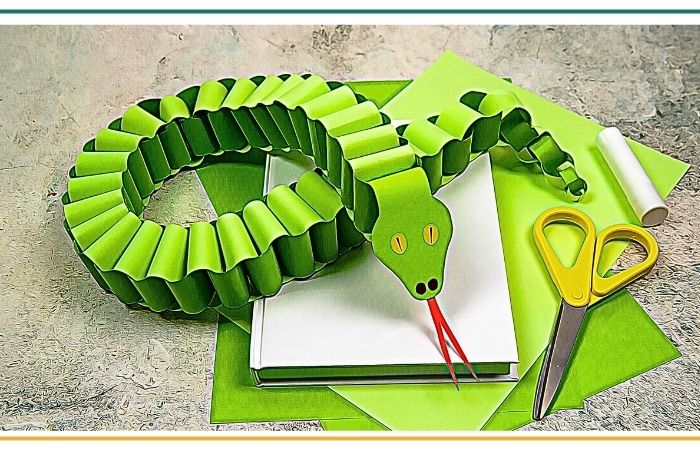
Before we begin making our paper chain snake, let’s gather all the materials we’ll need:
- Construction paper in different colors (green, red, yellow, etc.)
- Scissors
- Pencil
- Glue stick or craft glue
- Googly eyes or markers
- Black marker
- Tape or stapler (optional)
Step 1: Decide on the Snake’s Length and Width
To start making our paper chain snake, decide how long and wide you want your snake to be. Trace a rectangle shape on a piece of construction paper, making sure it’s long enough to create a chain of loops.
Step 2: Cut and Create the First Strip
Next, carefully cut out the rectangle shape using the scissors. Once you have your first strip, fold it in half lengthwise, matching up the shorter sides. Make sure the folded edge is at the top and create a crease by running your finger along the fold.
Step 3: Begin the Paper Chain
Using the folded strip, fold it again in the opposite direction, bringing the ends together. Glue the ends together using a glue stick or craft glue. This will be the first loop of your paper chain snake.
Step 4: Continue Adding Loops
To create more loops for your snake, take another strip of construction paper and insert it through the first loop. Fold it again in the opposite direction, and glue the ends together. Repeat this process, adding more loops until you reach your desired length for the snake.
Step 5: Decorate the Snake’s Face
Now, let’s give your paper chain snake a face! Cut out a triangle shape from a different-colored construction paper to create the snake’s head. Glue it onto one end of the paper chain.
Next, add googly eyes or draw eyes using markers. Use a black marker to draw a mouth and add details like a tongue or scales to make your snake look even more awesome.
Step 6: Add a Tail
To complete your paper chain snake, create a tail by cutting out a smaller triangle shape from the same-colored construction paper as the head. Glue it onto the other end of the paper chain. You can also use the black marker to add some details to the tail.
Step 7: Display or Play!
Your paper chain snake is all finished and ready to slither into action! You can display your snake as a fun decoration by hanging it on a wall or door. If you want to play with it, gently hold the head and let your snake wiggle and twist through the looped chain. Encourage your friends or siblings to join in the fun and have a slithering good time!
Step 8: Optional: Connect the Links
If you want your paper chain snake to be movable, you can use tape or a stapler to connect each loop of the chain. Just make sure to align the loops properly and securely attach them together. This way, you can create a snake that can twist and turn in any direction!
Have fun showing off your creation to family and friends, and let your imagination guide you as you embark on snake-filled adventures. Keep exploring the world of crafts and continue to unleash your creativity!
![]()


