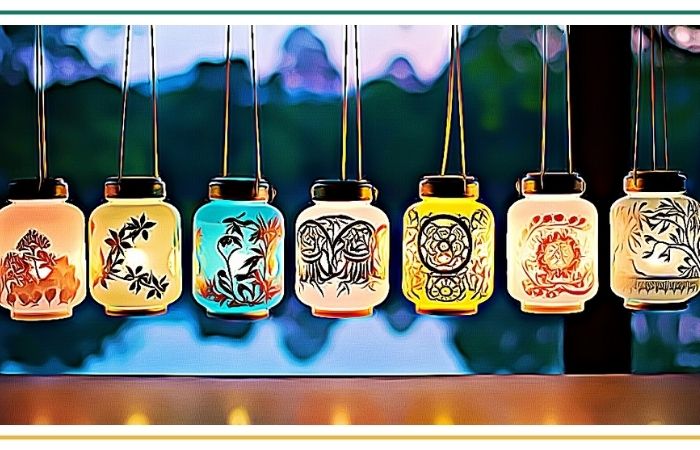
Are you ready to brighten up your evenings with a little touch of DIY magic with a beautiful painted a Mason Jar Lantern. Trust me, this activity is so much fun that even I couldn’t resist trying it out with my own kids!
It’s a warm summer evening, and my kids and I are sitting outside, admiring the stars in the night sky. But something was missing – a little extra sparkle! That’s when we decided to make our very own mason jar lanterns.
The joy and excitement on their faces as we created something beautiful together was absolutely priceless.
Directions To Painted Mason Jar Lantern
Now, I want to share this delightful experience with all of you. In this instructional post, I’ll guide you through the steps of creating these enchanting lanterns. So, gather your supplies and let’s dive in!
What You Will Need
- Mason jar
- Acrylic paints in your favorite colors
- Paintbrushes
- Painter’s tape (optional)
- Tea light candle
- Clear varnish or Mod Podge (optional)
- Ribbon or twine (optional)
- Newspaper or a drop cloth to protect your work surface
Step One: Prepare Your Work Area
Before we begin, it’s important to protect your work surface. Lay down some newspaper or a drop cloth to catch any drips or spills. This will make cleanup a breeze and keep things tidy. Now you’re ready to unleash your inner artist!
Step Two: Choose Your Design (Optional)
If you’re feeling extra creative, you can come up with your own design for your mason jar lantern. You can draw your design directly on the jar with a pencil or use painter’s tape to create patterns and shapes. This step is optional, so if you prefer the simplicity of a solid color, feel free to skip ahead to step three.
Step Three: Paint the Mason Jar
Grab your acrylic paints and paintbrushes, and let the magic begin! Dip your brush into the paint and start applying it to the mason jar in even strokes. If you’re using different colors, be sure to let each coat of paint dry before applying the next one. You can add as many coats as you like until you achieve the desired opacity. Don’t forget to paint the lid too if you want a cohesive look.
Step Four: Add Details (Optional)
If you’ve chosen to incorporate a design on your mason jar, now is the time to bring it to life! Use a smaller brush or a paint pen to add intricate details and fine lines. Let your imagination run wild – you can create flowers, stars, or even write inspiring messages. Get creative and make it truly yours!
Step Five: Let It Dry
Once you’re satisfied with your painted design, let the mason jar dry completely. This step is important to ensure that the paint sets and doesn’t smudge. Patience is key here, my crafty friends!
Step Six: Apply a Clear Coat (Optional)
For added durability and a glossy finish, you can apply a clear varnish or Mod Podge to the painted mason jar. This step will help protect the paint and make it last longer. Apply a thin, even coat and let it dry completely before moving on to the next step.
Step Seven: Assemble Your Lantern
Now that your painted mason jar is dry and looking fabulous, it’s time to assemble your lantern. Place a tea light candle inside the jar, making sure it’s secure. Consider using LED tea lights if you’re worried about safety. You can also tie a ribbon or twine around the neck of the jar for a decorative touch.
Step Eight: Light It Up!
Finally, it’s time to light up your masterpiece! Find a cozy spot in your room or outdoor space, switch off the lights, and ignite the tea light candle. Watch as the flickering flame creates a warm and inviting glow. It’s absolutely mesmerizing!
Tips For Painted Mason Jar Lantern
Congratulations, you’ve successfully created your own painted mason jar lantern! Now you can enjoy the magical ambiance it brings to any space
- Never leave a burning candle unattended.
- Keep the lantern away from flammable materials.
- Place the lantern on a heat-resistant surface.
- If using LED tea lights, ensure the battery is properly secured.
Remember, the sky’s the limit when it comes to creativity. Feel free to experiment with different color combinations, patterns, or even try out different jar sizes. These lanterns also make wonderful gifts for family and friends. So go ahead and share the joy of crafting with your loved ones.
![]()


