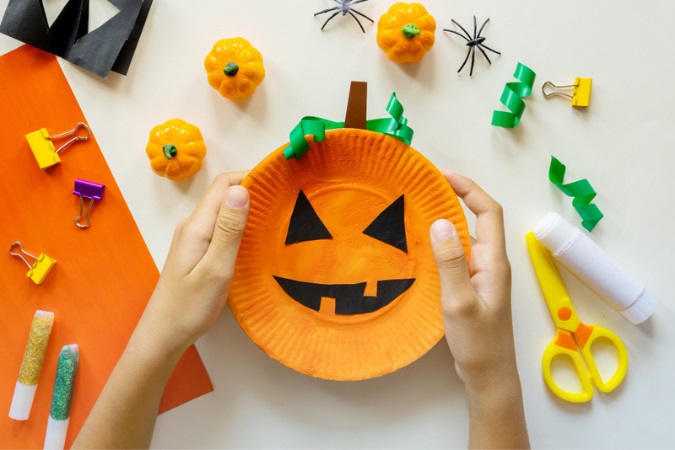
Pumpkins are the classic symbol of Halloween and fall, If you’re looking for a super-easy way to make one that won’t rot your teeth, try this Paper Plate Pumpkin Face!
Paper plates can be used for so many things—a quick snack? Sure! A game of Frisbee with your pup? Absolutely! A makeshift pumpkin for Halloween? YES.
You don’t even have to make the pumpkin for Halloween—you can make it any time of year because it’s that easy.
Paper Plate Pumpkin Face To Make At Home
I know, I know, it’s a little early to start planning for Halloween. But if you’ve got some time on your hands and you’re feeling crafty, then why not try this super-cute pumpkin decoration?
All you need is a paper plate, some orange paint and some brown paint, and some scissors (and maybe a glue stick). I’ve included all the instructions below.
You can make a whole bunch of pumpkins without ever leaving your house or going to the grocery store. All you need is one paper plate and some markers, and you’ve got yourself a full pumpkin patch!
What You Will Need
- paper plate
- orange paint and paintbrush
- marker
- black and brown construction paper
- scissors
- green ribbon or pipe cleaner
Directions For Paper Plate Pumpkin
Step 1: Start with orange paint

Make sure you have a paper plate that has a solid color. This will be the foundation of your pumpkin, so if it has polka dots or stripes or something like that, it might not look right. Now get your orange paint (and a paintbrush if you’re using liquid or gel) and cover your plate in it. Let it dry completely.
Step 2: Let the paper plate dry

Grab some markers and draw an outline of your pumpkin on the paper plate. You can make it any shape you want, but I find that round pumpkins tend to look better than square ones.
Step 3: Cut out the face

Take your markers and color in the outline. If you want your pumpkin to be orange, just fill in all the space with an orange marker. If you want it to be more colorful, use different colors for each part of the pumpkin (like green for the stem and yellow for the leaves).
Step 4: Glue the face parts on

Grab a pair of scissors and cut out your pumpkin from the paper plate! Now you’ve got yourself a whole patch worth of pumpkins without ever having left home! Just don’t forget to save those seeds for next year’s crop
Step 5: Add green swirls
![]()


