
Father’s Day is just around the corner, and we know what that means! It’s time for your kids to make a gift for Father’s Day. How about a Hot Cup Holder for Dad that he can take to work every day?
Does Dad has a favorite cup but it’s too hot to hold? Would your child like to help but doesn’t know how?
Well, now your preschooler can make a hot cup holder for him! This simple kid craft will make him feel loved, appreciated, and most importantly, warm. You can’t go wrong with a hot cup holder, custom-made by his little preschooler!
Hot Cup Holder To Make At Home
For Father’s Day, a Hot Cup Holder is a great gift for a preschooler to make for Dad. Hot cup holders are used primarily to easily hold cups or mugs without handles.
They’re very efficient and allow people to hold their cups for long periods without getting burned. This is very useful, especially for those who love to sip a hot coffee or a hot chocolate in cold weather.
This tutorial will show a preschooler how to easily make a hot cup holder. Let’s begin!
What You Will Need
- Blue & green felt
- Sewing needle
- Sewing thread
- 2 pcs. Medium buttons
- Craft scissor
- scissor
- pencil
- pattern paper
- hot cup for size reference
I have included recommended supplies to help your crafting experience. Some of the links below are affiliate links. This means that, at zero cost to you, I will earn an affiliate commission if you click through the link to complete your supply list.
Directions For Hot Cup Holder
Step 1: Prepare all the materials

Step 2: Draw an outline of cup
 Wrap your pattern paper around your hot cup to get the right dimensions for your holder. Draw some guidelines using your pencil.
Step 3: Cut the guidelines in the pattern paper
 You will use this pattern for the main body of the holder.
Step 4: Use the pattern as a template
 Place the pattern on top of the green felt and cut the felt in reference to the pattern. Set aside.
Step 5: Cut the blue section
 Using the same pattern, cut another section from the blue felt The width of this is much smaller than the green one. This will be the weaving material for the green felt to further thicken the holder.
Step 6: Cut the blue felt into three equal strips

Step 7: Cut vertical lines in green felt
 Using the craft scissors, equally cut several vertical lines on the green felt. There should be 1.5 cm. allowances on the top and the bottom part of this.
Step 8: Try out the fit of green slits
 Carefully finalize each vertical cut, make sure that the three blue strips will fit in the vertical cuts later.
Step 9: Weave the three blue strips on the green felt

Step 10: On a blanket stitch
 On one end of the weave, sew it using a blanket stitch.
Step 11: Do the same with the other end of the weave

Step 12: Try to fit the holder around the hot cup
 Take note of this, since this will determine where you will fix the ends of the holder.
Step 13: Add the buttons
 Sew the two medium buttons on the part where the ends will intersect with each other. Include the felt under it, where it intersects, to fix the holder totally. Make a double sew on this for added durability.
Step 14: Try out the cup
 Fit the cup holder and check if you are okay with it or you still need to make some alterations.
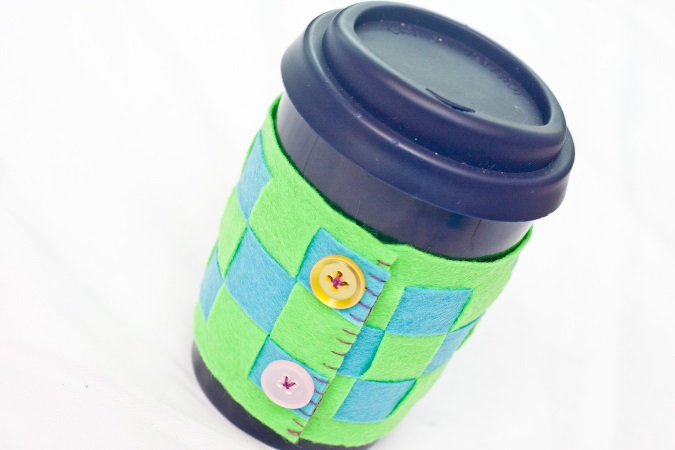
Step 15: Finally you are done!

You can now use your hot cup holder! Holding a hot cup has never been this easy with your own cup holder. You can personalize and use different colors or designs to suit your personality. You can reuse this hot cup holder several times since it is made from a durable material. Hope you like it!


