Are you ready to witness the power of a volcanic eruption right in your own backyard? Get your lab coats on because today we’re going to learn how to make a homemade volcano! It’s going to be an explosive experiment, so let’s get started!
What You Will Need
- An empty plastic bottle (like a soda bottle)
- Cardboard or a sturdy base
- Newspaper or plastic tablecloth (to protect your work surface)
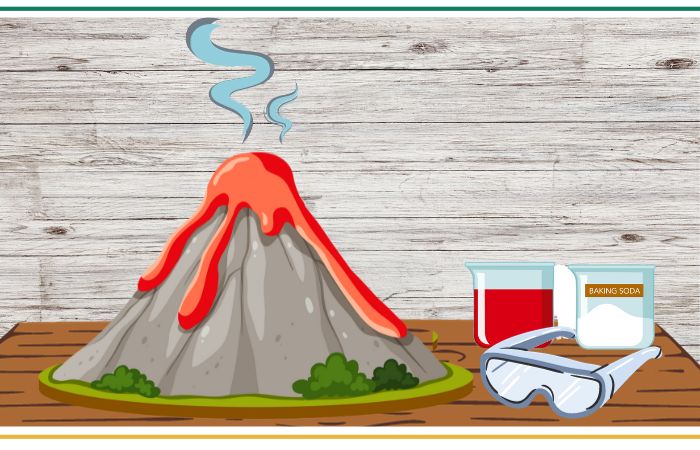
- Baking soda
- Vinegar
- Dish soap
- Food coloring (optional)
- Modeling clay or playdough
- Funnel (optional, but helpful)
- Safety goggles (always prioritize safety!)
Step 1: Set Up Your Work Area
Before we make our volcano, let’s set up a protected area to work in. We don’t want any mess spilling onto surfaces or flooring. Lay down newspaper or a plastic tablecloth to keep things tidy while you unleash the power of your volcano!
Step 2: Build The Volcano Base
Now it’s time to build the base for your volcano. Take your cardboard or sturdy base and position your plastic bottle upright in the center. Use modeling clay or playdough to stabilize and secure the bottle firmly in place. Mold the clay or playdough around the base of the bottle to create a volcano shape. Get creative and make it as realistic or as imaginative as you like. Remember, it’s your volcano!
Step 3: Prepare The Eruption Mixture
The eruption mixture is what will cause the volcano to erupt. In a separate container, combine about half a cup of vinegar, a few drops of dish soap, and a few drops of food coloring (if you want your eruption to have some flair). Mix everything together, but be careful not to create too many bubbles just yet.
Step 4: Get Ready For Eruption
Place your volcano on the protected work surface and make sure it’s stable. Put on your safety goggles to protect your eyes during the eruption. Now, it’s time to assemble the final components.
Step 5: Add The Eruption Mixture
Using a funnel (if you have one), pour the eruption mixture into the plastic bottle. Fill it up about ⅓ of the way, but be careful not to spill any of the mixture outside the bottle.
Step 6: Create The Lava Effect
To make your eruption more visually appealing, let’s create a lava effect. Take a tablespoon of baking soda and carefully drop it into the bottle. Take a step back and watch as the power of chemistry takes over!
Step 7: Witness The Volcanic Eruption
After adding the baking soda, step back and watch the magic happen. As the baking soda reacts with the vinegar, it will produce carbon dioxide gas, which will create a volcanic eruption. The eruption will cause the lava-like mixture to overflow and flow down the sides of the volcano—just like a real volcanic eruption!
Step 8: Repeat And Experiment
Now that you’ve successfully created your first volcanic eruption, don’t stop there! Feel free to repeat the experiment as many times as you want. Try different amounts of baking soda, vinegar, or even get creative and experiment with different colors or other materials. The sky’s the limit when it comes to science!
Step 9: Document And Share
Remember to document your scientific endeavor. Take pictures or videos of your homemade volcano in action. You can even create a presentation or share your experience with your friends, classmates, or family. Science is all about discovery and sharing knowledge!
Safety Tips:
- Always make sure to wear safety goggles to protect your eyes during the eruption.
- Perform the experiment outside or in a well-ventilated area to avoid inhaling any fumes.
- Do not touch or taste the eruption mixture or any materials used in the experiment.
- Ask an adult to supervise or assist you during the experiment, especially when handling the eruption mixture.
Congratulations, young scientists! You have successfully learned how to make a homemade volcano and witnessed a fascinating eruption. Remember, science is all about exploration and discovery. Keep asking questions, conducting experiments, and having fun. Who knows, you might just inspire the next generation of volcanologists or geologists!
So next time you’re looking for a fun and educational project, gather your materials, put on your safety goggles, and get ready to create your own volcanic masterpiece.
![]()


