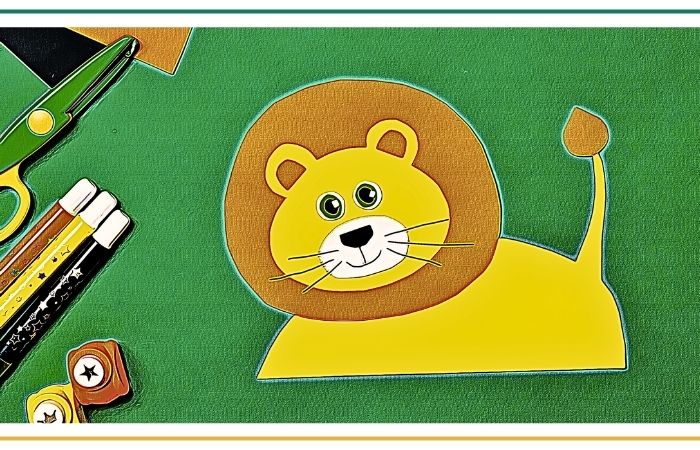
Roar-some news, crafty cubs! Prepare to embark on a roaringly creative journey as we craft a felt paper lion and bring our way into the wild kingdom.
Recently, my little lionhearted kiddos and I found ourselves knee-deep in felt and brimming with crafty ideas. With a little imagination and some strategic snips, we transformed ordinary pieces of felt into majestic, mane-tastic lions that could give the King of the Jungle a run for his money. Our lion creations quickly became the pride of our crafting collection, and now I’m here to spill the prideful secrets with you.

Directions For Felt Paper Lion

In this blog post, I’ll guide you through the step-by-step process of making your very own felt paper lion. So gather your courage, unleash your inner roar, and let’s get crafting! It’s time to create a lion masterpiece fit for the crafty jungle.
What You Will Need:
Before we start, let’s gather all the supplies we’ll need to create our felt lion:
- Yellow or tan felt paper
- Brown felt paper
- White felt paper
- Black felt paper or black marker
- Orange felt paper or orange marker
- Scissors
- Craft glue
- Googly eyes (optional)
- Pencil
- Template or drawing of a lion’s face (optional)
Step 1: Tracing and Cutting the Lion’s Head
Let’s start by tracing and cutting the lion’s head shape on the yellow or tan felt paper. You can either use a template or draw the shape freehand. Make sure the head is big enough to showcase the lion’s features and mane. Once you have the shape drawn, carefully cut it out using scissors. Take your time and make precise cuts to get the desired shape.
Step 2: Creating the Lion’s Eyes, Nose, and Mouth
Next, let’s bring our lion’s face to life! Using either googly eyes or black felt paper, cut out two small circles for the eyes. If you’re using black felt paper, cut out smaller white circles to make the eyes pop. Glue the eyes in place, giving your lion a cute and friendly expression. \
hen, cut a small triangle nose from either black felt paper or orange felt paper and glue it below the eyes. Finally, use the black felt paper or a black marker to draw a smiling mouth for our friendly lion.
Step 3: Designing and Cutting the Lion’s Ears
Every lion needs a pair of majestic ears, right? Take the brown felt paper and draw two ear shapes using a pencil. You can make them rounded or pointed, depending on how wild you want your lion to look! Once you’re satisfied with the shape, carefully cut out the ears using scissors. Make sure you have two identical ears that will fit nicely on the lion’s head.
Step 4: Attaching the Ears to the Lion’s Head
It’s time to attach those awesome ears to our lion’s head! Apply a thin layer of craft glue to the base of each ear and carefully position them on the top sides of the lion’s head. Press down gently to ensure they are securely attached. Take a moment to admire your lion’s adorably fierce look!
Step 5: Cutting and Gluing the Lion’s Mane
Now let’s add some flair to our lion with a magnificent mane. Using the brown or orange felt paper, begin by cutting thin strips that are about 1 inch wide and long enough to wrap around the outside edge of the lion’s head. Cut as many strips as you want to create a full and fluffy mane. Apply glue to the bottom edge of each strip and carefully attach them one by one along the outer edge of the lion’s head. It will start to look like a regal lion with a glorious mane!
Step 6: Optionally Decorating the Mane
If you’re feeling extra creative and want to make your lion’s mane even more impressive, consider using different colors or patterns for the mane strips. You can experiment with additional felt paper colors such as yellow, orange, or even different shades of brown.
Cut them into thin strips and glue them in between the original strips to add depth and variety to the lion’s mane. Let your imagination guide you to create the most unique and fancy lion around!
Step 7: Finishing Touches
Let’s put the final touches on our felt lion masterpiece! Using black felt paper or a black marker, cut or draw a few short lines near the bottom edge of the lion’s head to represent whiskers.
If you’d like, glue on googly eyes above the eyes you drew at the beginning for a fun and animated look that will surely make your lion stand out. Take a step back and admire your craft – isn’t your felt lion absolutely fantastic?
Step 8: Displaying Your Felt Paper Lion
Now that your felt paper lion is complete, it’s time to find the perfect place to display it. You can prop it up on a shelf, hang it on the wall, or even use it as a fun hand puppet during imaginative playtime. Your felt paper lion will bring a touch of the savannah into your home and can serve as a decorative piece or a beloved toy.
Too Busy To Make Felt Paper Lion …?
Try Cute Lions Scissor Skills Activity Book
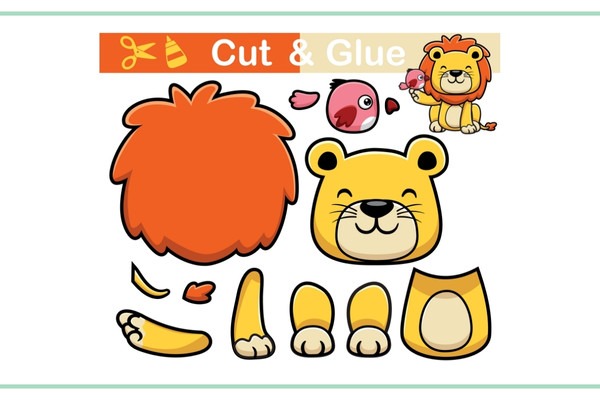
Cute Lions Scissor Skills Activity Book for Kids! – You can nurture your toddler’s creativity and fine motor skills with this engaging and educational activity book. With 50 unique cut, color, and glue activities, your little one will have endless fun while developing important developmental skills.
This book is designed with larger print and dimensions suitable for small hands, making it easy for your child to practice using scissors safely.


