
Kids love Christmas. And they will light up when they make this Awesome Christmas Lantern. When you hang it up, your kids will always be reminded of the true meaning of Christmas.
This star is said to symbolize the star of Bethlehem that is used by the three kings to track the manger of our Lord, Jesus Christ. This also symbolizes hope and triumph over the darkness or trials that are fought for the whole year.
The star-shaped Christmas lantern is traditionally made from bamboo sticks. The design, though sometimes mixed with other ornaments, is usually seen as a star pattern.
Christmas Lantern To Make At Home
To get into the holiday spirit, I’ve put together a Christmas lantern tutorial to help your child make unique and festive decorations.
If you have younger children and would like a great craft idea, then the Christmas lantern is for you. Generally, this is a papercraft that requires intermediate skills.
So, if your kids are ready for this creative challenge and would want to impress your family, then let us begin making this holiday lantern!
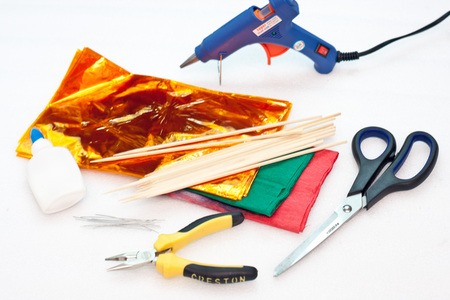
What You Will Need
- a pack of wooden skewers
- a yellow cellophane
- green and red crepe paper
- a piece of cardboard
- several pieces of at least 4 cm. long thin galvanized steel wire
- a bottle of white glue
- a long nose pliers
- a pair of scissors
- a hot glue
Directions For Christmas Star Lantern
Step 1: Gather the material needed
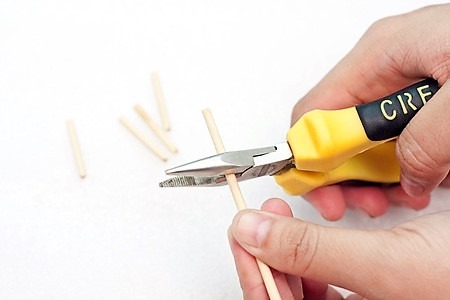
Step 2: Remove the point of wooden skewers
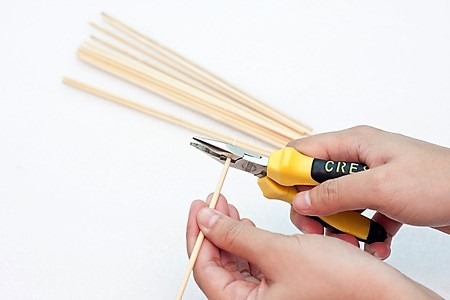
Remove the pointed part of the wooden skewer using long nose pliers. The cutter of the pliers will give you a cleaner finish than removing it using your bare hands alone.
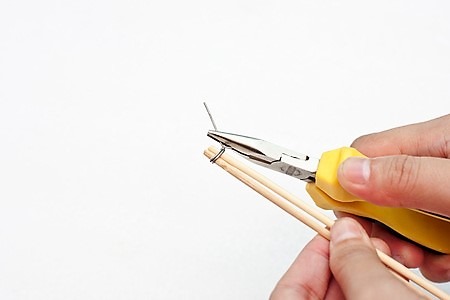
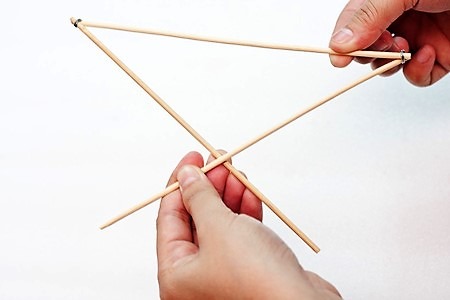
Step 3: Join two wooden skewers together
Join two wooden skewers together in one extreme end using a thin galvanized steel wire. Make sure to loop the wire twice around the sticks to maintain stability but make sure to leave some room for minimal movement since the sticks need to be partially movable.
Step 4: Tie another wooden skewer on the other free end of one stick
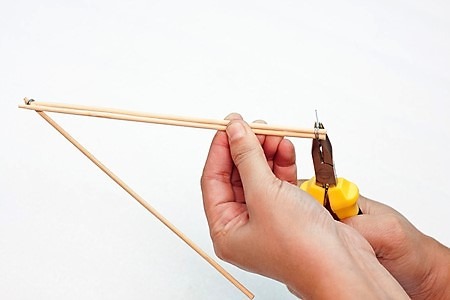
Do the same looping of the wire on this side.
Step 5: This is what it should look like
You are doing the right thing if you can partially open the wooden skewers in this manner.
Step 6: Form the wooden into a star
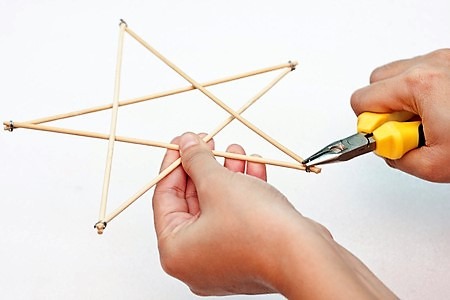
Continue adding pieces of wooden skewers together until you form a star. You must loop five wooden skewers to form the wooden star.
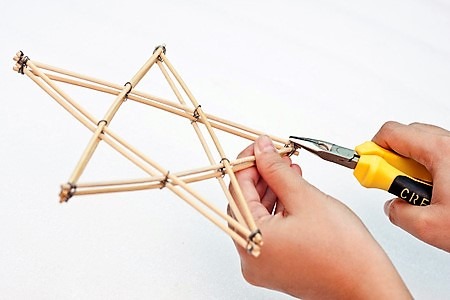
Step 7: Tie the sticks together
Tie the intersections of the sticks in the inner body of it to avoid further movement in the wooden star.
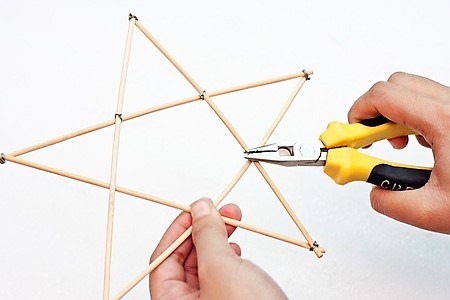
Step 8: Make another identical star
Make another wooden star and follow the same steps for this. This should be identical to the first one.
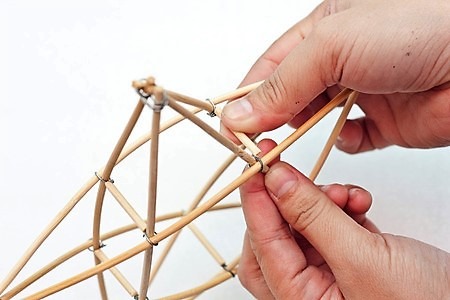
Step 9: Attach the two stars together
Place the wooden star on top of the other and bind them together by looping steel wires on the five ends of the wooden star.
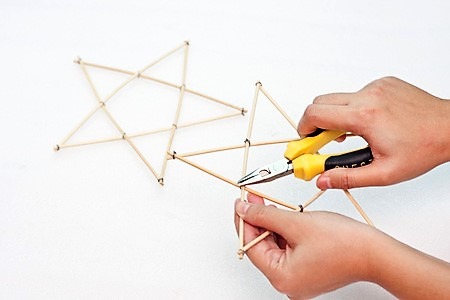
Step 10: Cut five 2-centimeter long sticks from the wooden skewers
Step 11: Add a small wood strip to separate the two stars
Carefully insert the 2-cm. long stick in between the inner intersection of the star. This will make the wooden star three-dimensional. Do this on all intersections.
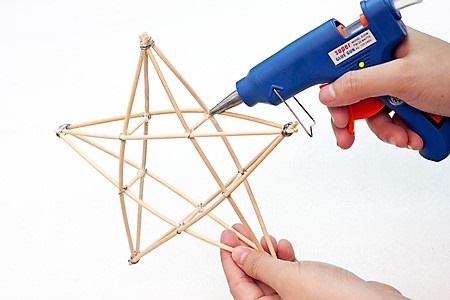
Step 12: Attach the sticks
Hot glue the short sticks in between the intersections to prevent it from popping out.

Step 13: Apply white glue on the wooden stick.
It is better if you will use your bare hands to spread the white glue on the stick. This will create an even distribution of the glue.
Step 14: Stretch the cellophane
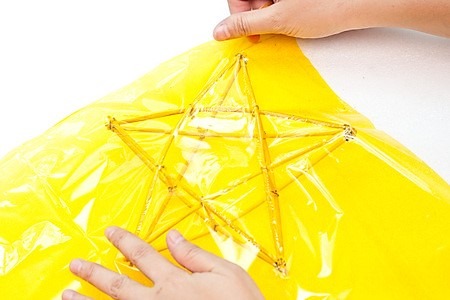
Stretch the yellow cellophane on top of the wooden star with glue and slowly place the cellophane on top of the wooden star’s body. Make sure that the cellophane is adhering to the wooden stick before you let go of it. Do the same thing on the other side of the wooden star. Stretching the cellophane is crucial on this step so it is better that you ask for someone to help you if you are having a hard time on this part.
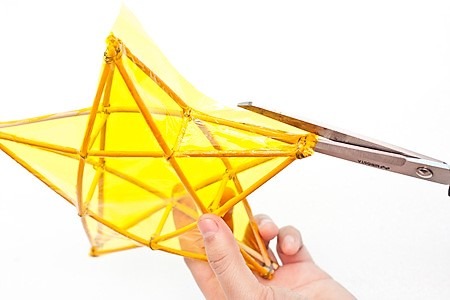
Step 15: Cut the excess cellophane in between the star edges
Step 16: Cut ten rectangle pieces of cellophane
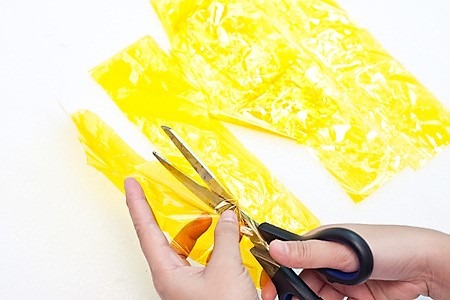
Make an approximation as to how big the corners of the wooden star lantern are. This rectangle cellophane will be used on the corners of the star.
Step 17: Add glue to the sticks
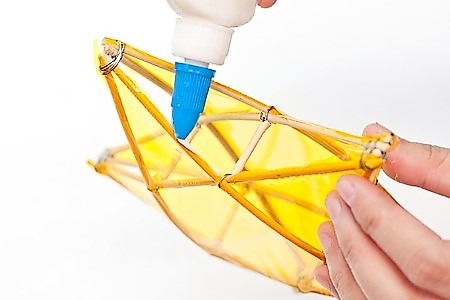
Apply considerable amounts of white glue on the sticks around the corner of the wooden star lantern.
Step 18: Tuck in the cellophane
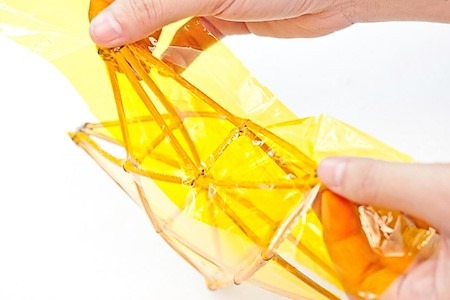
Stretch the rectangular cellophane while slowly placing it on the corners of the wooden star. Do these on all corners until you completely cover the whole wooden star.
Step 19: Cut the excess bits of cellophane on the corners
Step 20: Cut a strip of red crepe paper

This should be at least 3-centimeter in width. Fold the strip lengthwise and create short vertical cuts on the folded part of the strip. Unfold it afterward and fold it on the opposite side with the same orientation. This will allow the cuts on the strip to pop out.
Step 21: Add red strips to all five ends of star
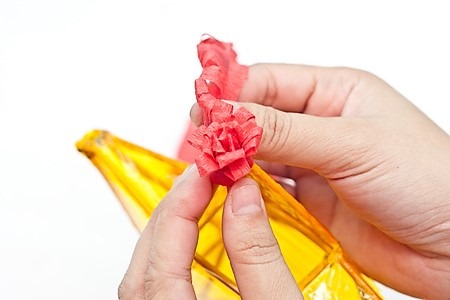
Wrap the red strips from the later step on the pointed ends of the star. Wrap it around at least 2 to 3 times and glue the end of the strip. Do this on all five-pointed ends of the star.
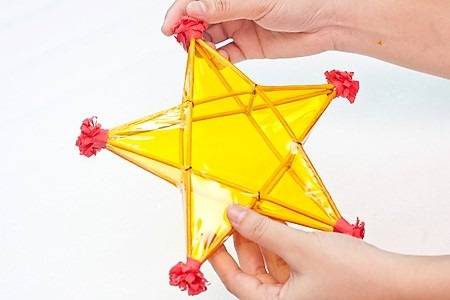
Step 22: Wooden star looks like this
The wooden star should look like this when the red strips are placed properly.
Step 23: Cut two squares from the green crepe paper
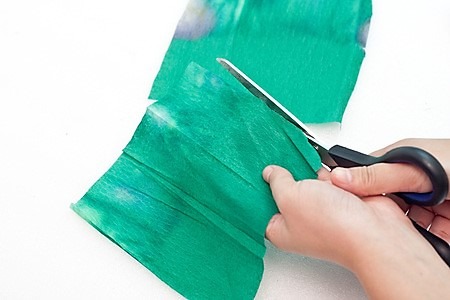
The dimension should be at least 8-centimeter by 8-centimeter.
Step 24: Fold the green square diagonally
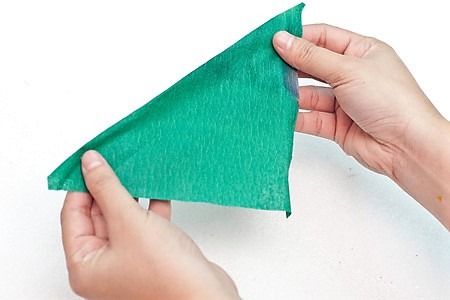
Step 25: Create another diagonal fold
The center of the square should be the reference of this fold. The final fold should form a right triangle.
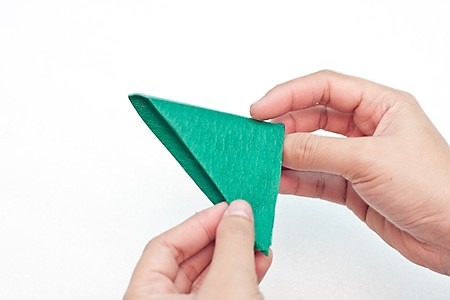
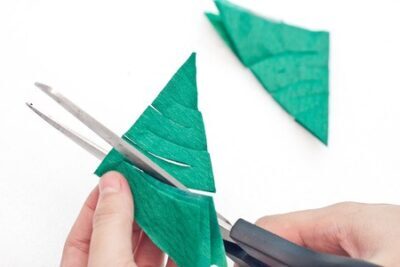
Step 26: Cut curvy cuts into green squares
Create curvy cuts in opposite directions starting from the center of the square or the tip of the right triangle. Do the same thing on the other green square.
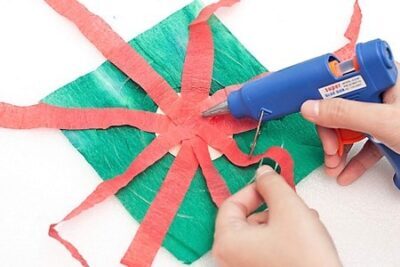
Step 27: Cut red crepe paper
Cut a strip of red crepe paper that is at least 1-centimeter in width. The length of the strip should be longer than the total length of the green square, much better if you can make it longer than usual.

Step 28: Cut two pieces of a square from the cardboard
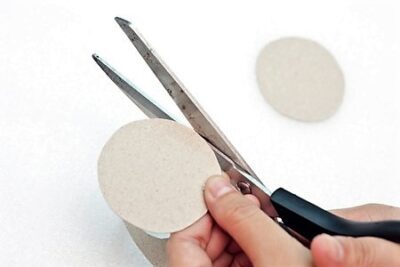
The diameter of this should be at least 3 to 4 centimeters. The scaling of the size would depend on the size of the wooden star.
Step 29: Attach the cardboard circles to green squares
Unfold the green squares carefully and place the circle cardboards in the center of it. Hot glue the circle cardboards on the square crepe papers.
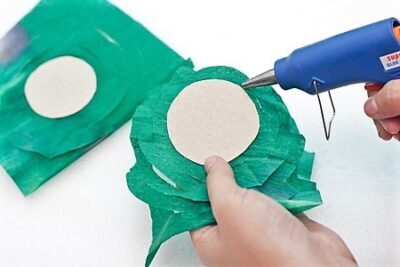
Step 30: Glue red strips to circle cardboard
Glue the red strips of crepe paper on the tip of the circle cardboard. Glue the strips in reference to the middle part of the circle. The number of strips to be placed should be around 8 to 12 pieces.
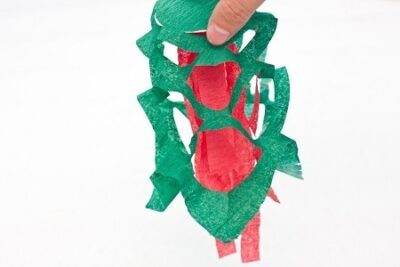
Step 31: Invert the cardboard circle
Turn the circle upside down and hold the part where the green crepe paper is seen. This will be the “tail” of the star lantern. Make sure you have a pair of tails for this star lantern.
Step 32: Insert wire hooks
Create a hole in the middle of the tail and insert a wire hook using long nose pliers. Do the same thing to the other tail.

Step 33: Add the tails

Carefully insert the tail on the pointed end of the wooden star through the wire hook. Hot glue the tail from its base to the main body to make it more stable especially if you are planning to hang this outdoors. Insert the other tail on the immediate side of the first tail. Do the same procedure for this one.
Step 34: Add a wire loop to the top
Insert a long wire on the tip of the topmost part of the star lantern. Create a loop from the wire and cut the excess from it. This will serve as the hanging loop of the star lantern.
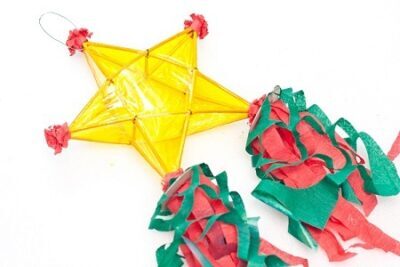
Finally done! You can now display your traditional three-dimensional Christmas star lantern!
This traditional Christmas lantern is widely used outdoors and can also be decorated further. You can sprinkle some glitters if you want to add some sparkling effect. Bigger versions of this star lantern usually come with a light inside, either a small CFL bulb or LED one, which makes this lantern beautiful at night. This lantern might be time-consuming but when you are done, this is definitely worth it! So what are you waiting for?! Share it with a friend or a family member! Happy holiday
RELATED TOPICS
Smart Arts And Crafts For Kids: A Parent’s Guide To Creative Fun


