
Cats are fun creatures to own, and kids love to play with them. So why not make a cute Cat Bag Tag that your kids can attach to their school bag?
Bag tags are very useful to many, especially if you keep losing your bag. The bag tag contains important information, such as the name of the bar owner, and the address or the name of the school or company that you are in.
These tags are common among kids, especially in kindergarten and preschoolers. They love to see their names on their bags.
Cat Bag Tag To Make At Home
Kids will love to make the cat bag tag because it is a fun craft activity for them to do. It will teach them how to make something useful out of simple materials that they can find around the house.
Some bag tags cost a lot, especially the personalized ones. But this tutorial will show you how to make a cute, low-cost animal bag tag. Your preschooler can personalize it with any colors that she likes.
So, let’s have fun doing this!
What You Will Need
- Blue, white and purple sponge paper
- Craft scissors
- Plastic cover
- A piece of sewing invisible clip button
- Black marker
- Concrete glue
Directions
Step 1: Gather the material needed

Step 2: Cut a cat head form from the purple sponge paper

Step 3: Make a pair of cat ears

Cut a pair of ears by forming a pointed triangle on the topmost part of it. You can use blue sponge paper for this. This will be the cat’s ear.
Step 4: Concrete glue the ear on the purple head

Step 5: Cut a pair of small oblongs. This will be the eyes of the cat

Step 6: Glue the eyes just below the ears of the cat

Cut a small triangle that is proportional to the face of the cat. This will be the nose of the cat. Glue the nose in the center of the face just below the eyes.
Step 7: Cut six small short strips from the blue sponge paper

Step 8: Glue the blue strips in pairs for both sides of the cat’s face

You should have three pairs for this. This will be the whiskers of the cat.
Step 9: Using a black marker, draw the mouth of the cat

Step 10: Draw the cat’s distinctive eyeballs

Step 11: Cut a rectangle that is big enough to fit in the back of the cat’s head

Use a blue sponge paper for this. Carefully cut the middle of the rectangle leaving just a small border on it. This rectangle will be used to hold the information on the bag tag.
Step 12: Cut a piece of plastic and glue it on the rectangle

Step 13: Trim the excess plastic on the sides of the rectangle

Step 14: Fix the rectangle on the back of the cat’s head

Step 15: Cut a strip of white sponge paper that is 7 cm. x 2 cm

Step 16: Cut another blue strip

Cut another blue strip, but this time, slimmer than the white one with 1 cm. in width only.
Step 17: Concrete glue the blue over the white sponge strip

Step 18: Fix the strip on the top of the cat’s head
Generously glue this for durability since this will hold the bag tag to the bag itself.

Step 19: Attach the sewing invisible clip button
Generously glue the sewing invisible clip button on the strip

Step 20: Write important information on tag
Write the important information like name of the bag owner, address, contact number, etc. on a piece of paper and slip the paper on the information box on the back of the cat’s head.

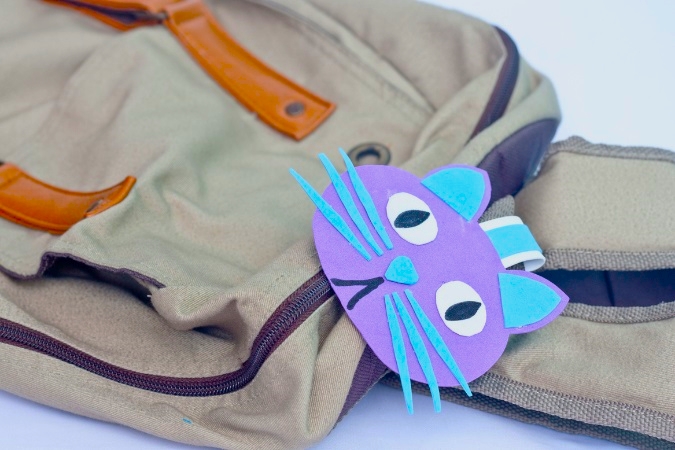
Step 21: Your animal bag tag is ready to use!

You can also use this to tag your lunch boxes, purse or even water jugs. The length of the strip that holds the bag tag can also be altered based on your needs, especially if you want a longer strip. This bag tag is also waterproof since we used sponge paper. Make several animals if you want! Share it with your family and friends! Enjoy!
RELATED TOPICS
Smart Arts And Crafts For Kids: A Parent’s Guide To Creative Fun


