 When it is hot outside, a July 4th barbeque is a great way to have fun! Your kids can make this July 4th Calendar Bowl from old calendars. It is a delicious way to show their patriotic side.
When it is done, you can place it on your table and spread the fun.
If you’re like most people, you throw out your old calendars after a year is over.
But what if we told you that there’s a better way of saying goodbye to your old calendars? That’s right: instead of throwing them away, why not upcycle them into a useful craft for July 4th?
July 4th Calendar Bowl To Make At Home
I’m about to show you how your kids can use old calendars to make a bowl. They can combine some simple household items to create a fab patriotic bowl you can use on July 4.th
If your kids like the summer holidays, then making this July 4th Calendar Bowl is a great way to spend time with your kids. They’ll enjoy decorating their table with patriotic decorations and watching their guests admire them.
Just make sure you supervise the entire process carefully–you don’t want sparks and a mess flying everywhere!
What You Will Need
- Old paper calendar
- White glue
- Water
- Aluminum bowl as model
- Spoon
- Working bowl
- Scissors
- Water based paints
- Paint brush
I have included recommended supplies to help your crafting experience. Some of the links below are affiliate links. This means that, at zero cost to you, I will earn an affiliate commission if you click through the link to complete your supply list.
Directions For July 4th Calendar Bowl
Step 1: Prepare all the material

Step 2: Pour white glue

Pour a considerable amount of white glue on the working bowl.
Step 3: Add water

The ratio of glue to water must be 2:3.
Step 4: Mix it well

Mix it until the mixture is homogenized.
Step 5: Cut small strips

Cut several small strips of paper from an old calendar.
Step 6: Make sure that the strips are soaking wet

You can add more glue mixture if you like.
Step 7: Add strips inside the aluminum bowl

Using the aluminum bowl model, paste several wet strips around the inner bowl.
Step 8: Cover it completely

Keep on doing this until you completely cover the bowl. It is better if the layers are much thicker, so that it would be easier later to remove the paper bowl.
Step 9: Let it dry

Let the mache dry for 3 to 5 hours.
Step 10: Detach the paper mache

Carefully detach the dried paper mache bowl from the aluminum bowl.
Step 11: Sculpt the edges

Design the edges by cutting it in a wavy fashion.
Step 12: Prime the bowl

Prime the bowl with white paint first. Let it dry after.
Step 13: Paint the bowl again with white paint

Take note that this should be done on both sides.
Step 14: Paint the bowl

Paint the bowl with the desired color. In this tutorial, we used red.
Step 15: Add a second coat

Continue doing this until you get the desired outcome. You can paint it twice.
Step 16: Let it dry
Let the paint dry for an hour or two before you use it.
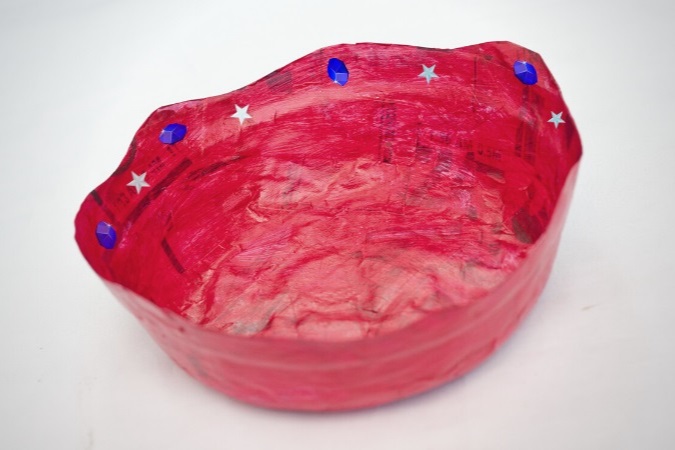
Step 17: Add embellishments. Finished!
You can now use your ornamental bowl. This ornamental bowl is perfect for your living room. You can also customize this based on your personality.


