
Thanksgiving is colorful, creative, and so much fun! I don’t know about you, but I’m always looking for new ways to entertain my kids. And this Apple Pumpkin Stamp is a great way to get them excited about the fall season.
Kids will love these apple pumpkin stamps! They’re the perfect way to get your kids involved in fall festivities.
This stamp is also a great way for the kids to help with decorating cards. And your little ones can help you to put together a beautiful table setting for Thanksgiving.
Fun Apple Pumpkin Stamp To Make At Home
Who doesn’t love a good pumpkin for Thanksgiving? Who doesn’t love a good apple for fall? Combine them both, and you have one food that is good for so many things!
As a kid, one of my favorite crafts was making stamps. I remember using scraps of paper, paint, and an old pair of scissors to create my masterpieces. It gives them a chance to be creative in ways they might not be able to with other projects.
Young artists will love making an apple pumpkin stamp. With these simple instructions, your kid will have fun for hours … So let’s begin!
What You Will Need
- -Apple
- -Paper plate
- -Paint (We used orange!)
- -Paintbrush
- -Sharp knife
Directions For Apple Pumpkin Stamp
Step 1: Gather the material

Step 2: Prepare the apple

Cut two apples in half so that you have four flat sides. Cut through both the top and bottom of the apple, so that you end up with two flat sides. Make sure to do this step, since the knife is sharp!
Step 3: Paint the apple

Dip the one side of an apple into green paint. Allow the paint to thoroughly cover the half of the apple
Step 4: Stamp it on the paper

Stamp it on your paper plate to make your pumpkin patch! We used orange paint, but any color will work!
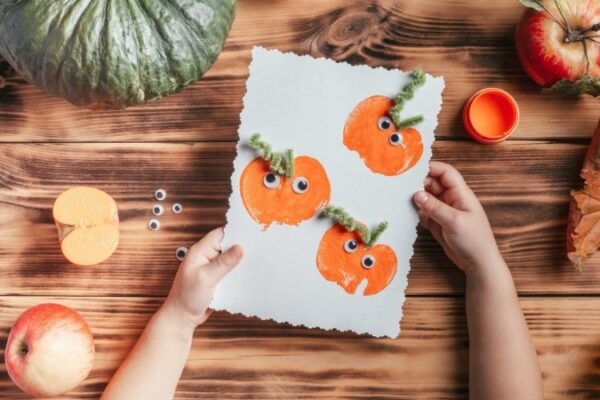
Step 5: Glue the eyes on

When you have enough stamp, start making the faces
Attach 2 googly eyes to each face
This will have a fun face effect and really bring the pumpkin to life. This should dry pretty quickly.
Step 6: Add ivy with green pipe cleaners

You can add ivy with green pipe cleaners.
To add vines to your pumpkins, take a piece of green pipe cleaner and twist it around a pencil or pen until it’s curly.
Then attach it to your paper with some glue dots or tape!
If you place it just above the pumpkin fake, it will look like a pumpkin that is growing from vines.
Step 7: Let it dry
Let it dry for 1-2 hours.
Have fun experimenting with different colors throughout your process.
And if you’re using white paper plates like we did, consider using black paint at some point—it makes an awesome silhouette effect.
![]()


