
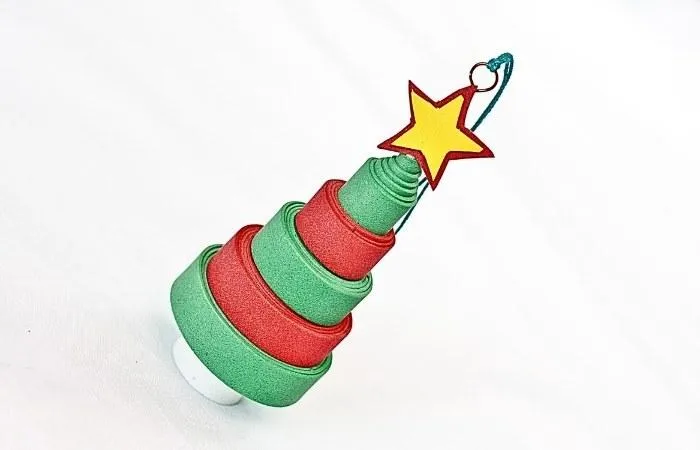
How To Make A Festive Tree Ornament
Creating a balloon top decor offers a charming and unique way to decorate for events or add a playful touch to your home décor. Below is a step-by-step guide to making one, elaborating on each step for clarity and success.
Step 1
Gather the following material:
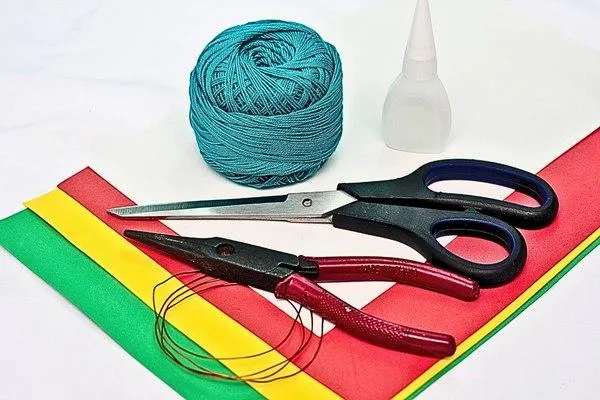
I have included a list of available craft supplies for your convenience.
· Sponge paper (red, green, yellow, and white)
· Copper wire
· Long nose pliers
· Scissors
· Concrete glue
· Crochet thread
Step 2
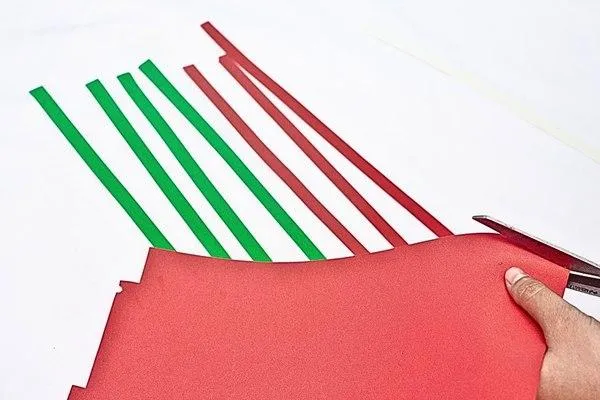
Cut strips of sponge paper in red, green, and white to create the layers of your Christmas tree. The width of each strip depends on your preferred look . Thicker strips will make taller layers, while thinner ones create a more delicate design. Decide how full or slim you want your tree to be before cutting..
Step 3

Take one white strip and roll it very tightly to form the sturdy base of the tree. When rolled firmly, this base will keep the tree stable and hold all the other layers securely..
Step 4
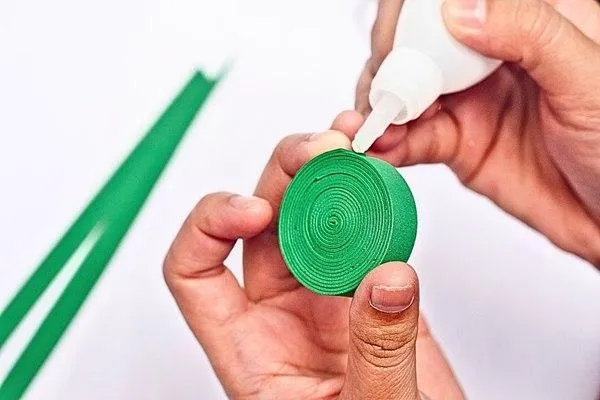
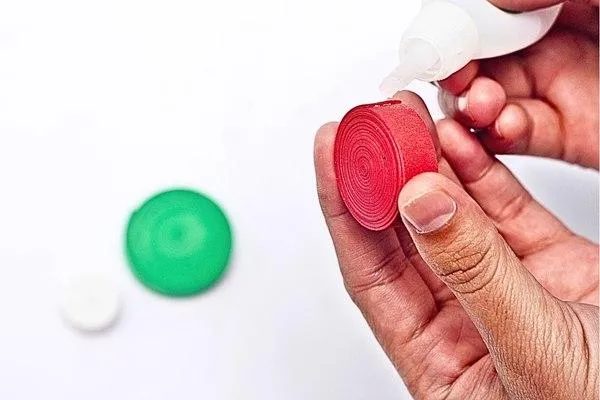
Grab a green strip and roll it tightly to create the first and thickest layer. Once rolled, use concrete glue to seal the end securely. This base layer will shape the bottom of your Christmas tree and give it a strong foundation.
Step 5
Make four additional layers for your tree by alternating red and green strips. Roll each strip tightly, then seal the ends with concrete glue. Remember, each layer should be slightly narrower than the one beneath it to create a balanced tree shape. Stack them to visualize the overall design and adjust rolls if needed..
Step 6
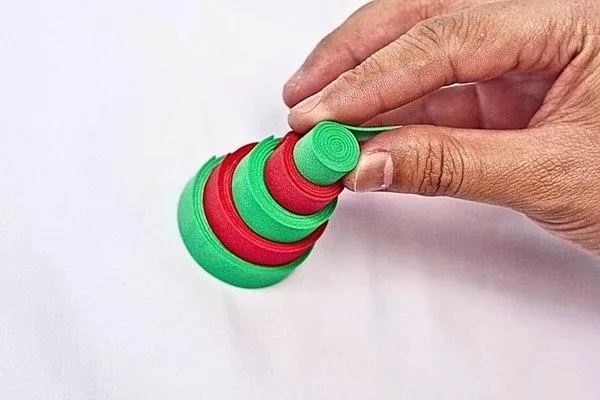
Place all the sponge rolls on top of each other to ensure the diameters are proportionate. Now is the time to confirm if your Christmas tree has that perfect tapered shape. Adjust or re-roll layers if needed to create the right proportions..
Step 7
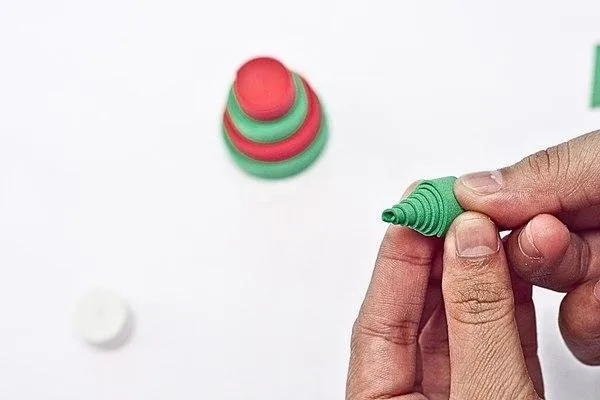
Take the top green roll and push the middle outward using your finger or a pointed object like a pen. This indentation will act as the space to secure your star later. Keep the roll firm while creating the shape.
Step 8

Trim the tip of the pushed green roll with scissors to flatten it. This makes room for attaching the star securely at the very top of the tree without wobbling or slipping..
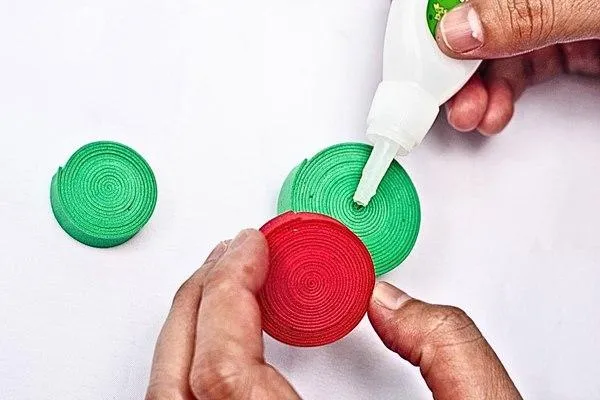
Step 9
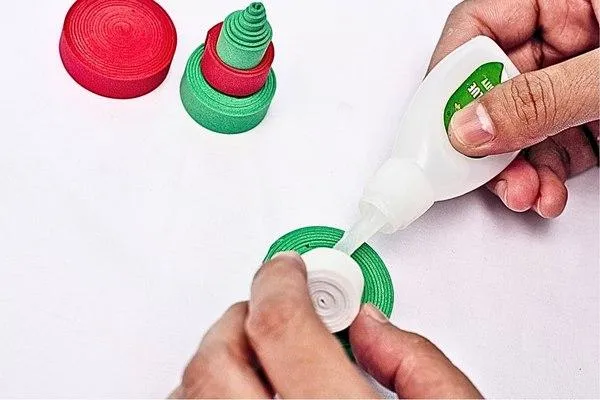
Join the layers of the Christmas tree together by gluing the white base to the largest green roll first. Continue stacking each layer tightly, gluing as you go. Make sure they are firmly stuck together—this adds durability so you can reuse your ornament year after year
Step 10
Join the layers of the Christmas tree together by gluing the white base to the largest green roll first. Continue stacking each layer tightly, gluing as you go. Make sure they are firmly stuck together—this adds durability so you can reuse your ornament year after year.
Step 11
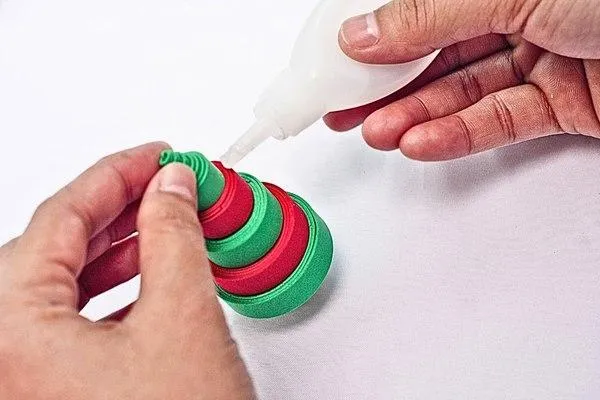
Fix the pointed green roll to the very top of your tree. Allow it to dry properly before continuing to the next steps. This will ensure the structure remains sturdy and looks neat..
Step 12

Cut a small star shape from the yellow sponge paper. To add dimension, glue it onto a slightly larger red sponge piece, creating a shadow effect. Trim any excess red sponge to finalize this festive touch..
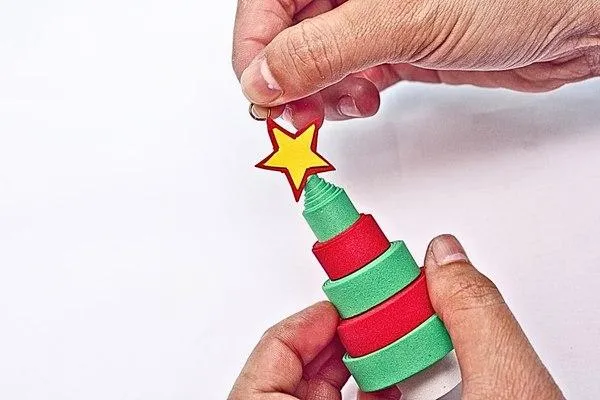
Step 13
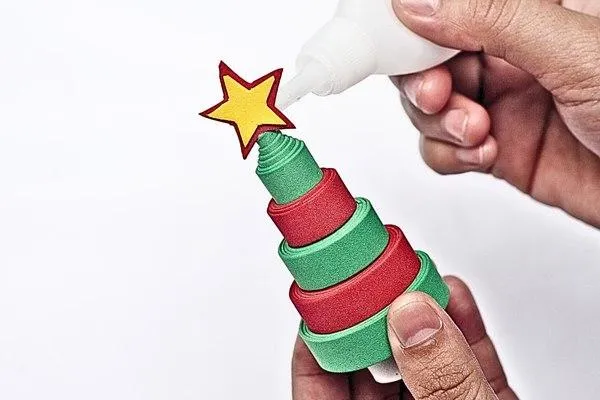
Glue your finished star to the flattened tip at the top of your tree. Make sure it's centered so it looks balanced and enhances your final design.
Step 14
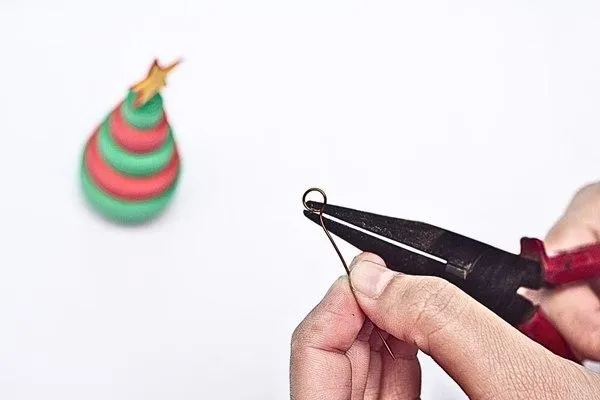
Using long nose pliers, twist a piece of copper wire into a small loop. This loop will allow your ornament to hang from your tree. Glue the wire loop securely to the back of the star.
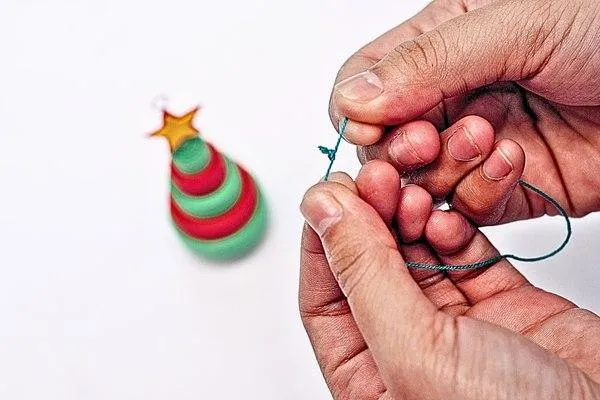
Step 15
Cut a suitable length of crochet thread to hang the ornament. Tie the thread tightly to ensure it doesn’t loosen when the ornament is hung.
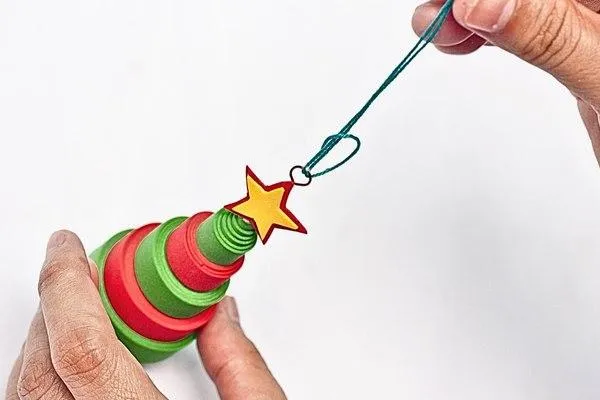
Step 16

Thread the crochet string through the copper wire loop. Secure the knot and test to see if your ornament is ready to hang without slipping or falling off..
Step 17
Cut a suitable length of crochet thread to hang the ornament. Tie the thread tightly to ensure it doesn’t loosen when the ornament is hung.
.
Step 18
Thread the crochet string through the copper wire loop. Secure the knot and test to see if your ornament is ready to hang without slipping or falling off.
Step 19
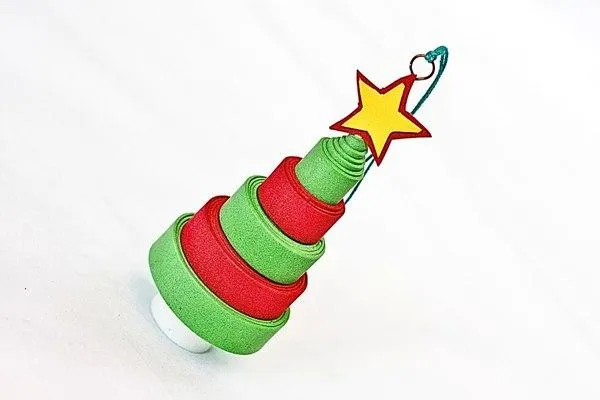
Your mini Christmas tree ornament is complete! Hang your new creation on your Christmas tree or use it as part of your holiday decor. Make a few more to give as handmade gifts or brighten every corner of your home for the season.
More Craft Ideas


Kid Craft

How To Make A DVD Bracelet
Kid Crafts For Every Child

Toddler Crafts

Preschool Crafts

School Crafts

Teen Crafts
Kid Crafts For In and Outdoors

Indoor Crafts

Outdoor Crafts

Educational Crafts
Kid Crafts For Every Season

Spring Crafts

Summer Crafts

Fall Crafts

Winter Crafts
Kid Crafts For Every Holiday

Valentine's Day Crafts

St Patrick's Day Crafts

Easter Crafts

Mother's Day Crafts

Father's Day Crafts

Fourth Of July Crafts

Halloween Crafts

Thanksgiving Crafts