
How To Make Fun Shamrock Shades
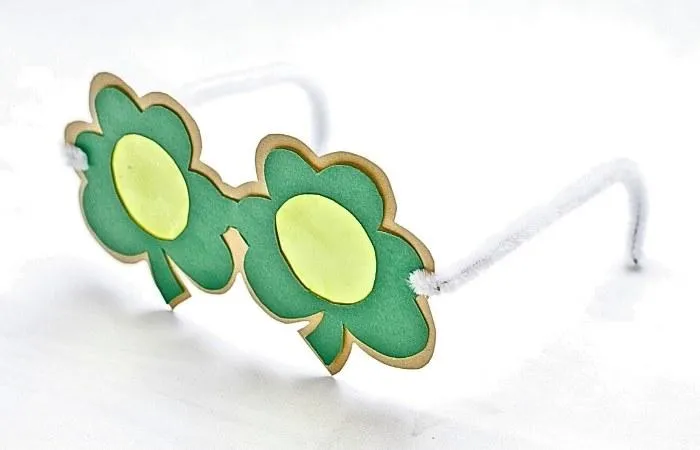
Celebrate St. Patrick's Day in style with DIY shamrock shades that are fun to wear and perfect for festive parties!
This homemade project allows you to craft unique, colorful glasses shaped like shamrocks, using simple materials like cardboard, cellophane, and pipe cleaners.
Personalize them with your own flair and wear them proudly to add extra charm to your celebration. Let’s dive into this step-by-step guide and create some eye-catching shamrock shades!
Step 1
Gather the following material:
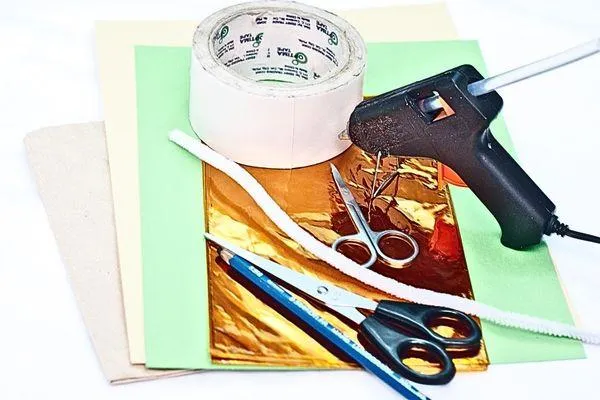
I have included a list of available craft supplies for your convenience.
2 pieces cardboard (green and yellow)
pattern paper
pencil
scissors
Short, pointed scissors
a piece of white pipe cleaner
hot glue
yellow cellophane
double-sided tape
masking tape or paper tape (optional)
If you click on any link, I will receive a small commission at no cost to you.
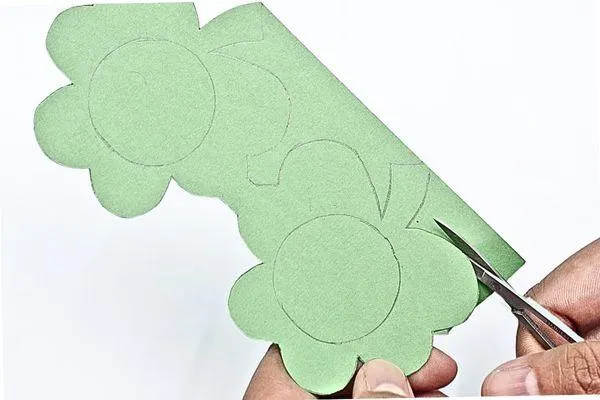
Step 2
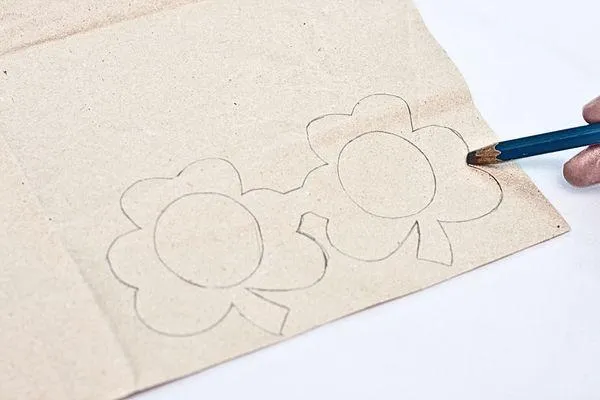
On a piece of pattern paper, draw two shamrock shapes. Between them, draw two circles to be where your eyes will go..
Step 3
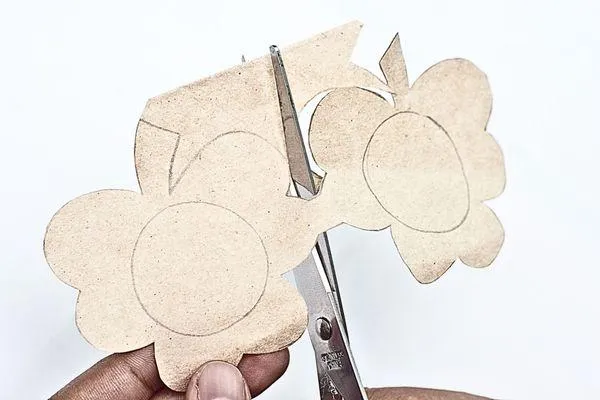
Use scissors to carefully cut out the shamrock pattern you've drawn, along with the eye circles..
Step 4
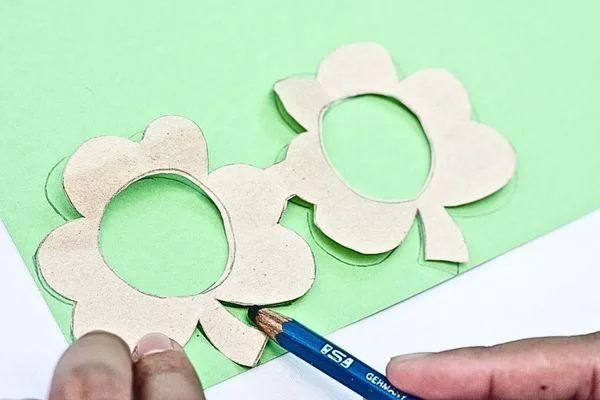
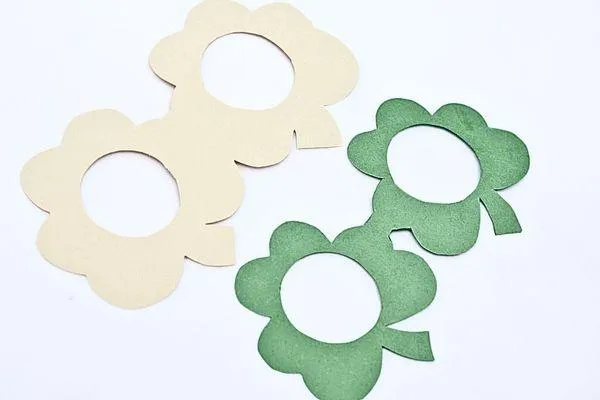
Place your pattern on the green cardboard and trace around the shamrocks with a pencil..
Step 5
Next, cut along the traced lines on the green cardboard. Remember not to cut out the eye circles yet..
Step 6
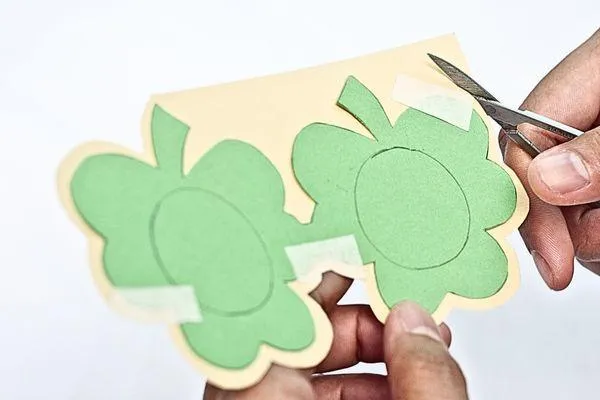
Tape the green shamrocks onto yellow cardboard. Use whichever tape you like best. Carefully cut around the green cardboard, leaving a small border.
Step 7
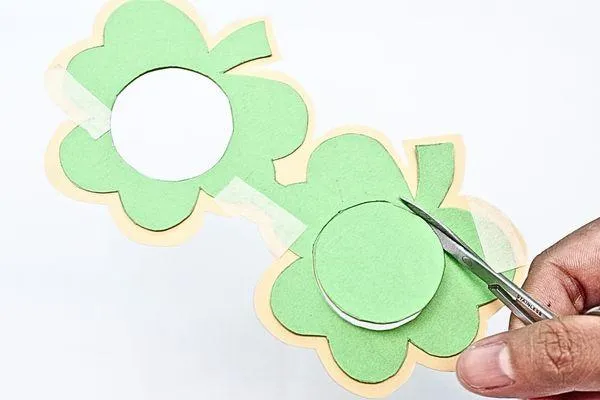
Now you can cut out the eye circles in the middle of both shamrocks..
Step 8
Take off the tape, and you'll see your shades are shaping up just like the picture..
Step 9
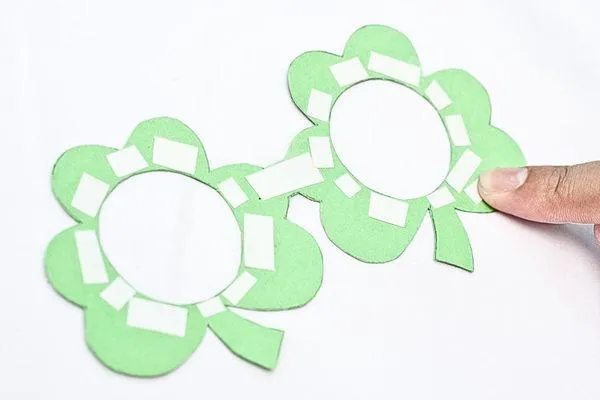
Put small strips of double-sided tape around the edges of the eye circles on the green shamrock.
Step 10
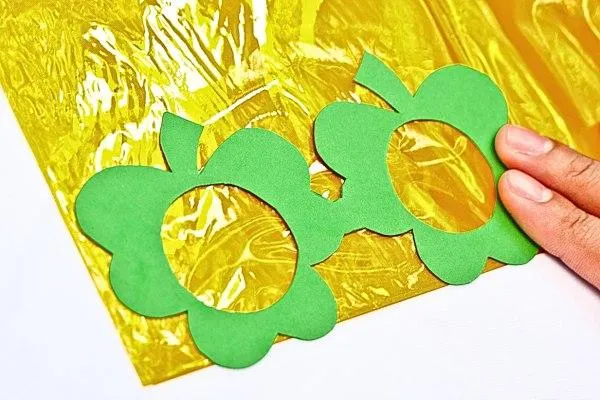
Stick the green cardboard shamrocks onto the yellow cellophane. Smoothing it out on a flat table helps avoid wrinkles.
Step 11
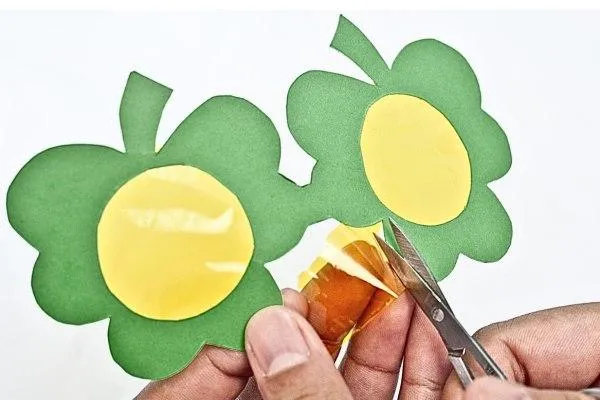
Carefully cut away any extra cellophane around the sides of the green shamrocks.
Step 12
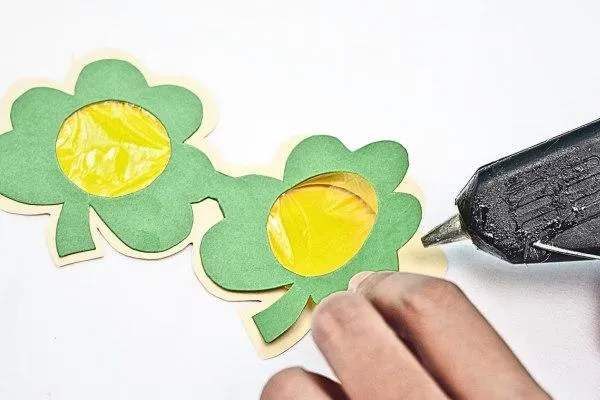
Line up the circles on the green and yellow shamrocks and glue them together.
Step 13
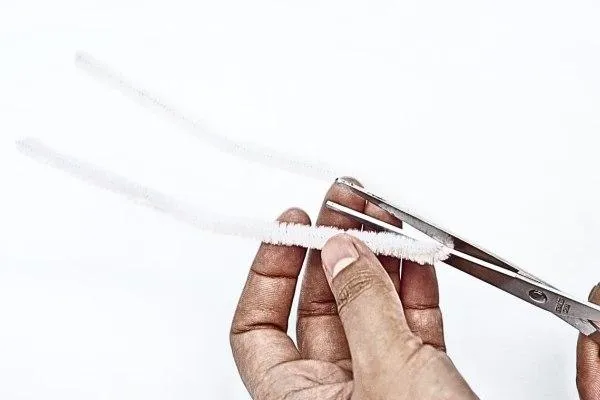
Fold a white pipe cleaner in half, then cut it. These pieces will be the parts that sit on your ears.
Step 14
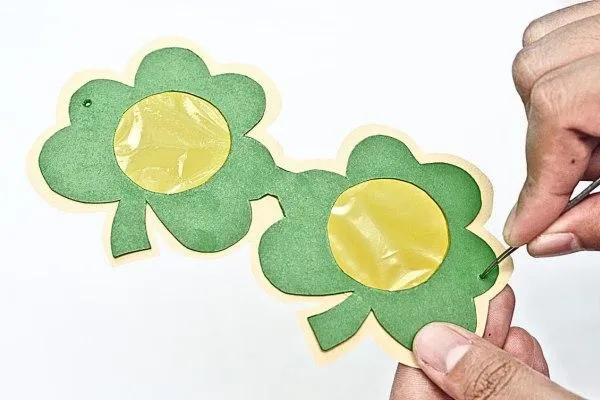
Make a hole on each side of the shades, in line with where your ears will be.
Step 15
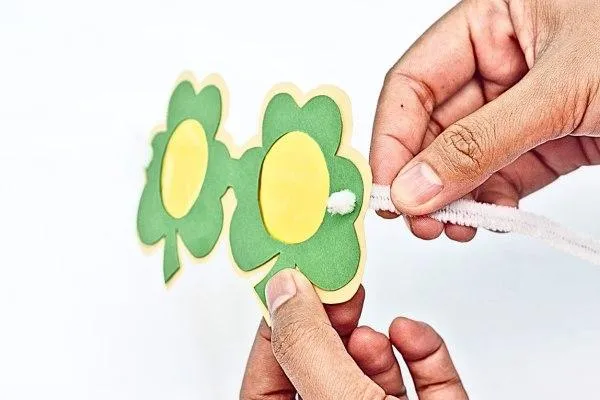
Put one half of the pipe cleaner through each hole you've made..
Step 16
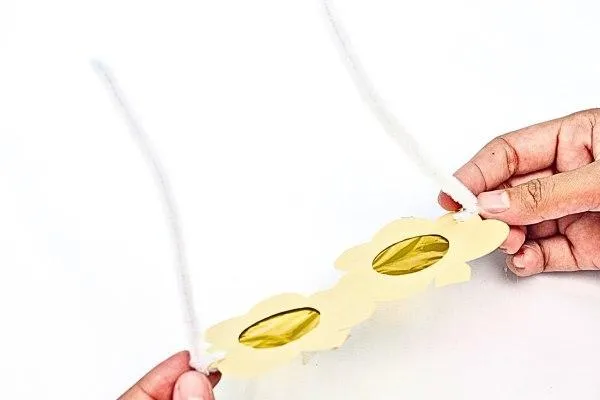
Fold about 1 centimeter of the pipe cleaner's end to keep it attached to the shamrock..
Step 17
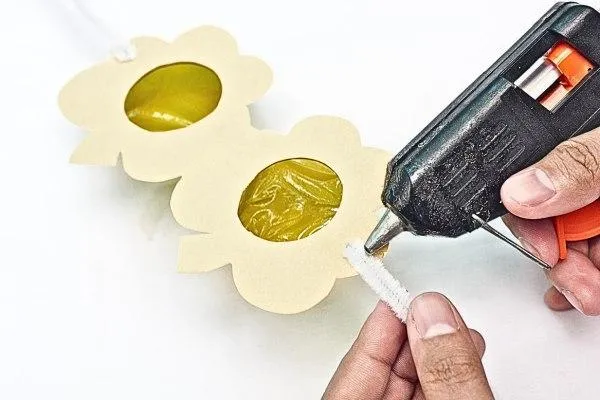
Use a hot glue gun to permanently attach the pipe cleaners on both sides of the shades.
Step 18

Gently bend the pipe cleaners so they will fit comfortably on the wearer's head.
Step 19
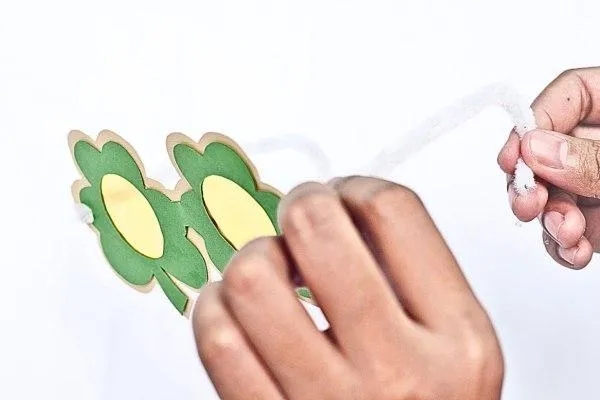
Curve the ends of the pipe cleaners to make sure they grip behind your ears.
Try on your shamrock shades and make any small tweaks to get them fitting perfectly.
Step 20
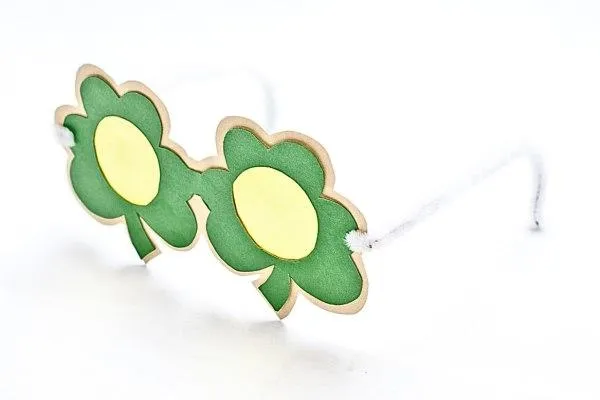
Celebration time! You now have your very own shamrock shades to wear while you enjoy St. Patrick's Day!
More Craft Ideas
Kid Craft
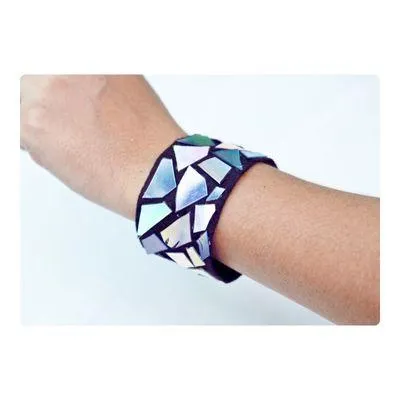
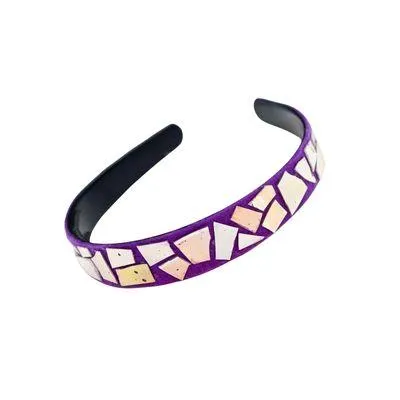
How To Make A DVD Bracelet
Kid Crafts For Every Child
Toddler Crafts
Preschool Crafts
School Crafts

Teen Crafts
Kid Crafts For In and Outdoors

Indoor Crafts
Outdoor Crafts

Educational Crafts
Kid Crafts For Every Season
Spring Crafts

Summer Crafts

Fall Crafts

Winter Crafts
Kid Crafts For Every Holiday
Valentine's Day Crafts

St Patrick's Day Crafts

Easter Crafts
Mother's Day Crafts

Father's Day Crafts

Fourth Of July Crafts
Halloween Crafts

Thanksgiving Crafts