
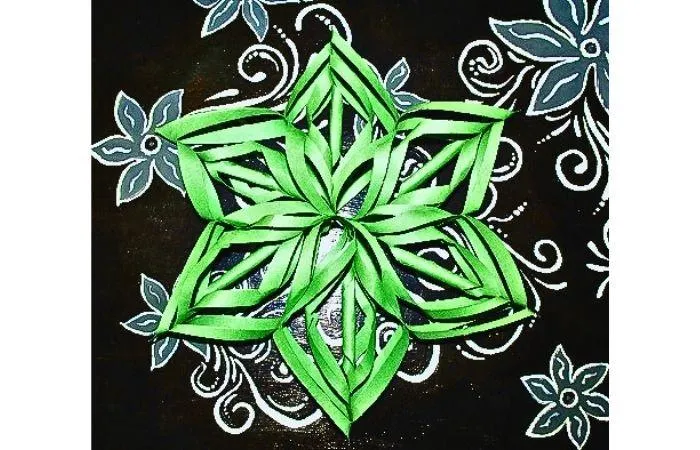
How To Make A Whimsical Paper Snowflake
There's nothing more magical than creating your own snowflake decorations to bring charm to your home or add a personalized touch to the holidays. And Paper Snowflakes are a classic winter craft that never goes out of style! There's
Using just construction paper and basic materials, you can craft stunning 3D snowflakes that look impressive but are surprisingly easy to make.
Follow this step-by-step guide for an enjoyable and creative project that’s perfect for kids and adults alike. Let’s create a snowy masterpiece!
Step 1
Gather the following material:
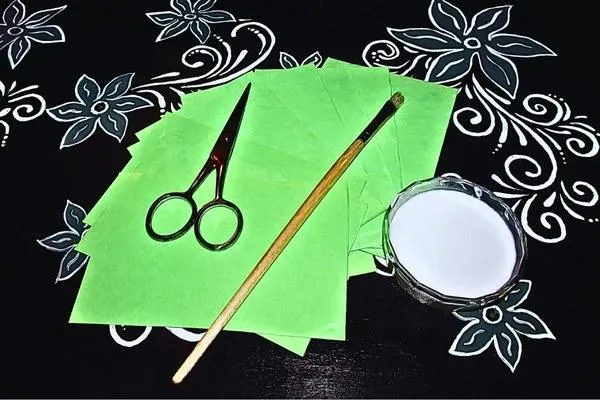
I have include a list of available craft products for your convenience:
Construction paper
Glue
Scissors
Paint brush
Step 2
Start by folding a piece of construction paper into halves three times. This will divide the paper into eight smaller rectangles. Use scissors to carefully cut along the fold lines to separate the rectangles.
For this project, you’ll need six rectangles, so discard or save the extras for another craft.
These smaller pieces will become your snowflake’s building blocks. Make sure the edges are neat to ensure your snowflake looks clean and polished.
Step 3
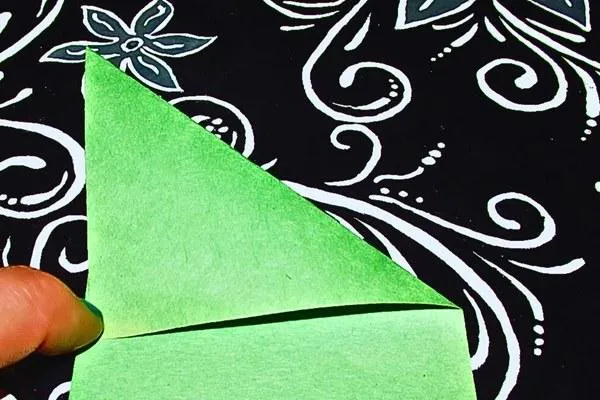
To make your snowflakes symmetrical, you need to turn the rectangles into squares. Take one rectangle, fold one corner diagonally until the edges meet, and carefully cut off the excess paper at the top.
Repeat this step for the other five rectangles. The square shape is essential, as it allows you to create even patterns when cutting and folding later on. Take your time to make clean cuts, ensuring each square is perfectly even on all sides.d!
Step 4
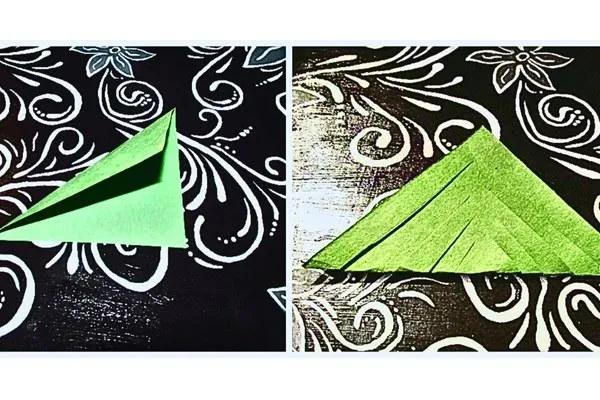
Take a folded square and fold it in half again. While it’s folded, use scissors to cut evenly along both sides, but don’t let the cuts meet in the center.
This step creates the intricate patterns of your snowflake, and careful cutting makes the design more detailed.
Avoid cutting all the way through—doing so might accidentally remove parts of your snowflake. Repeat this process for all six squares, ensuring your cuts are as even as possible.
Step 5
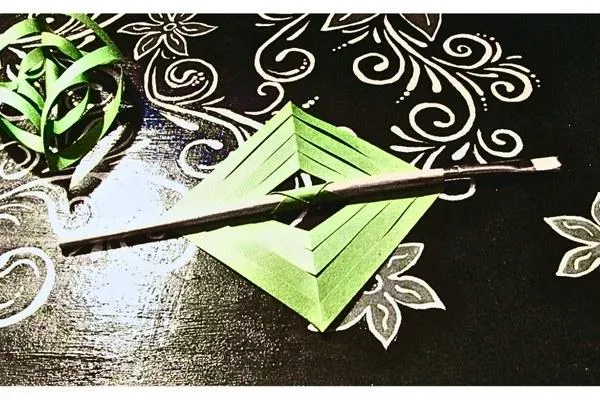
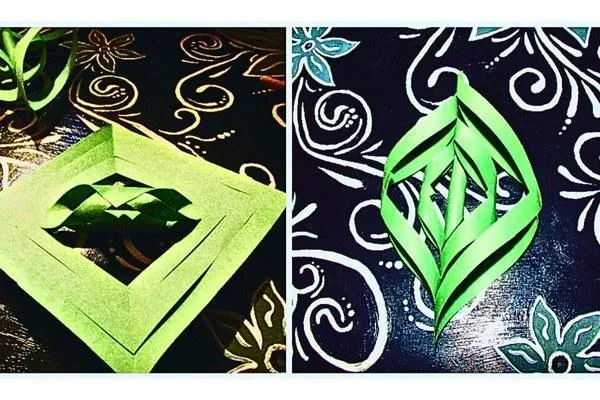
Unfold one square to reveal the designs created by your cuts. Place your paintbrush at the center of the paper. Roll up one side of the paper toward the brush and secure it with a dab of glue.
Then roll the opposite side over it and glue them together. This creates the 3D "petal" shape.
Repeat this process for all layers of paper. Every square will transform into a single snowflake section, forming its unique structure.
Step 6
Turn the paper over and repeat Step 4 on the opposite side. Glue the next layer of cuts together using the same method, rolling and securing each fold around the paintbrush.
Continue this process layer by layer until all folds are glued together.
These overlapping layers give your snowflake its signature 3D effect. Once finished, follow the same steps for all six paper pieces and place them aside to dry completely.
Step 7

Once you have six completed sections, it’s time to assemble the snowflake. Start by applying glue at the base of each "petal" and gently press them together.
This part requires patience, especially when joining the last two petals. You may need to carefully push the other pieces aside to make room for the final layers.
Be sure to press gently but firmly so the glue adheres tightly without tearing the paper.
Step 8
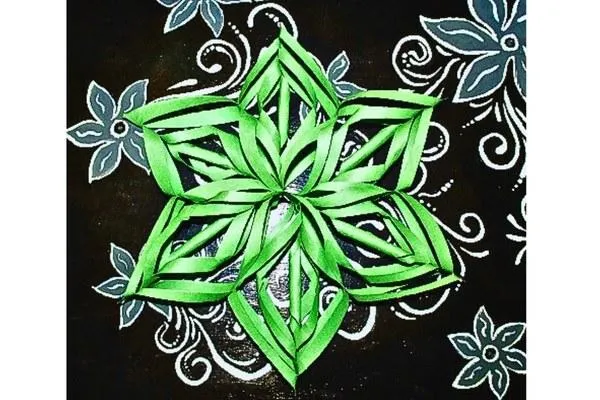
After gluing all the petals at the base, it’s time to finish the snowflake’s design. Add glue where the petals meet at the center and press them gently together.
Arrange them until the snowflake resembles an "X" shape. This final step locks the structure in place, making the snowflake ready to hang or display.
Once the glue dries, your finished snowflake will be both sturdy and visually stunning!
Enjoy Your Handcrafted Snowflake
You’ve made an enchanting 3D snowflake! Whether you hang it on your wall, use it as a table centerpiece, or add it to your holiday displays, your handmade snowflake will bring a sense of whimsy and creativity to your space. Feel free to experiment with different paper colors and sizes to make a variety of snowflakes. Each one will be unique, just like real snowflakes!
A Whimsical Paper Snowflake is a magical way for teens to explore creativity while adding winter charm to any space. Kids will enjoy the surprise of each unique design as they cut and unfold.
Keep the fun going—explore more of our craft articles for endless creative inspiration!
More Craft Ideas
Kid Craft
How To Make A DVD Bracelet
Kid Crafts For Every Child
Toddler Crafts
Preschool Crafts
School Crafts

Teen Crafts
Kid Crafts For In and Outdoors

Indoor Crafts
Outdoor Crafts

Educational Crafts
Kid Crafts For Every Season

Spring Crafts

Summer Crafts

Fall Crafts

Winter Crafts
Kid Crafts For Every Holiday
Valentine's Day Crafts

St Patrick's Day Crafts

Easter Crafts
Mother's Day Crafts

Father's Day Crafts

Fourth Of July Crafts
Halloween Crafts

Thanksgiving Crafts