How To Make Star Spangled Earrings
July 4th isn't just fireworks and barbecues; it's a great chance to get crafty with your kids! This year, why not add a little sparkle to your celebration by making Star Spangled Earrings?
These fun, patriotic earrings are easy and exciting to create with just a few basic supplies. Imagine your children’s faces lighting up as they wear their handmade jewelry to the local parade or picnic.
Not only is this a creative way to bond, but it also lets them show off their American pride in style! Let's get started on these delightful accessories.
Step 1
Gather the following material:
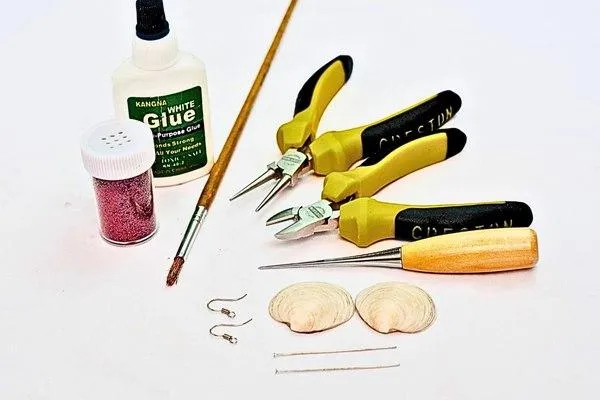
I have included a list of available craft supplies for your convenience.
2 clamshells (clean and dry)
A pair of earring hooks
Small side cutter pliers
Small round nose pliers
2 pieces of earring wire
Awl pinpoint hole tool
White glue
Red glitter
Silver stars
Small paintbrush
Newspapers
Step 2
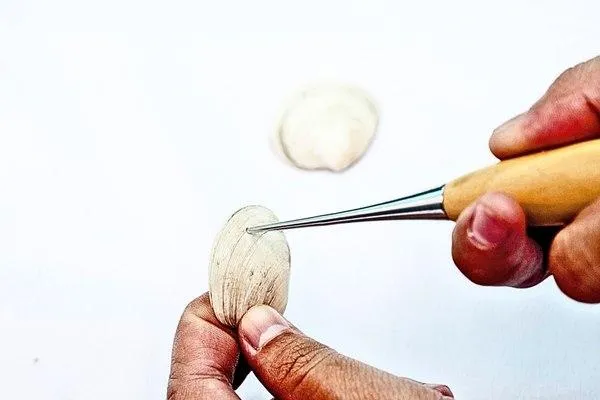
Using an awl pinpoint hole tool, carefully poke a small hole at the top of each clamshell. The hole should be sturdy enough to hold the earring wire securely, so work slowly to avoid cracking the shell.
This step sets the base for attaching your earring hooks later on. Once finished, double-check the holes to make sure they are even and in the right spot.
Step 3
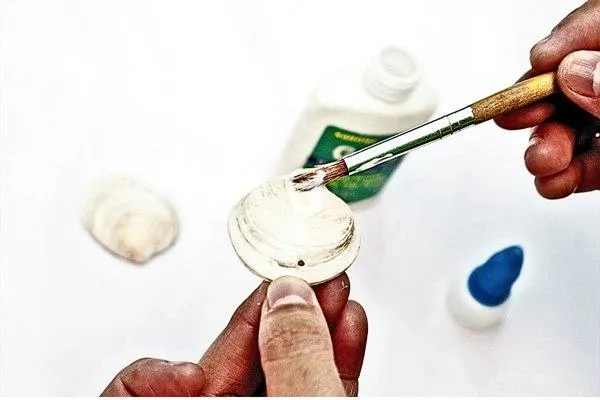
Take your small paintbrush and cover one side of each clamshell with a coat of white glue. Focus on the rough outer side of the shells—this is where you’ll add the glitter.
Brush on a smooth layer, ensuring no spots are dry, as the glue creates the perfect adhesive surface for your decoration..
Step 4

Generously sprinkle red glitter all over the glued side of the clamshells while working over the newspaper to catch any excess.
The glitter adds a bold patriotic touch to your design, making your earrings festive and fun.
Now let the glue dry completely for 1 to 2 hours to avoid smudging—a little patience here will pay off later.
Step 5
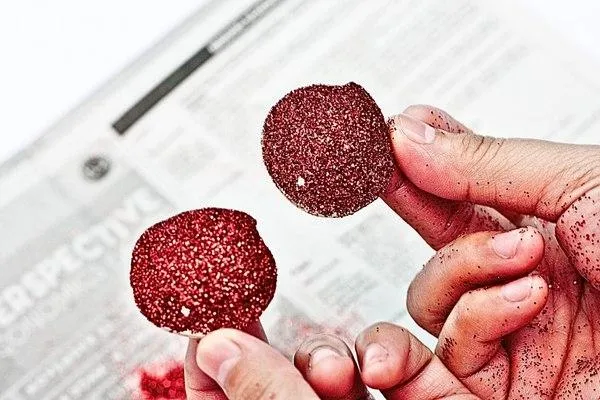
Once the glue has dried, gently shake off any loose glitter from the clamshells onto the newspaper. This step gives your shells a clean, sparkly finish without any glitter mess.
If needed, use your fingers to brush off stubborn excess glitter carefully. Now your clamshells are ready for the next part of the assembly process!
Step 6
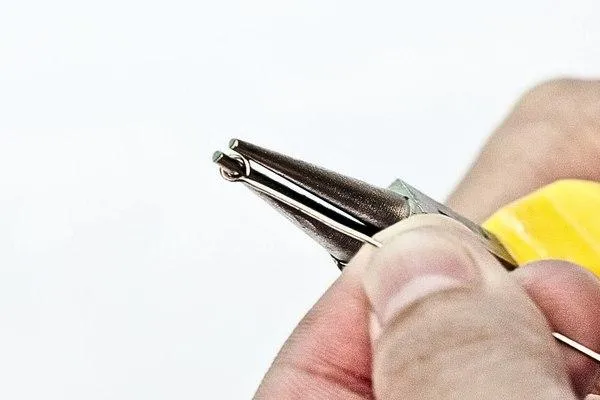
Using your round nose pliers, start forming a small loop at the end of each earring wire. This loop serves as the base for attaching hooks and clamshells.
Carefully shape the loop to ensure it looks clean and polished. Repeat the same steps for both pieces of wire for uniformity.
Step 7
Using your round nose pliers, start forming a small loop at the end of each earring wire. This loop serves as the base for attaching hooks and clamshells.
Carefully shape the loop to ensure it looks clean and polished. Repeat the same steps for both pieces of wire for uniformity.
Step 8
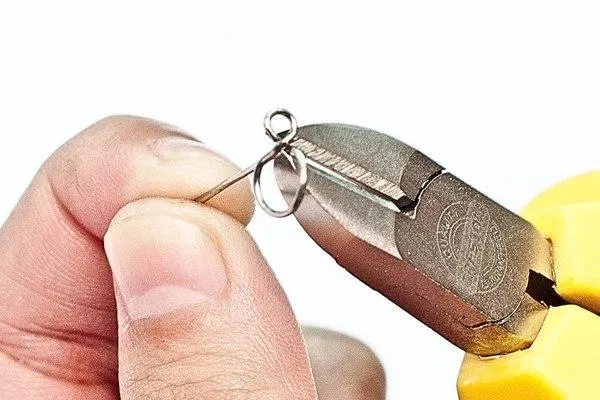
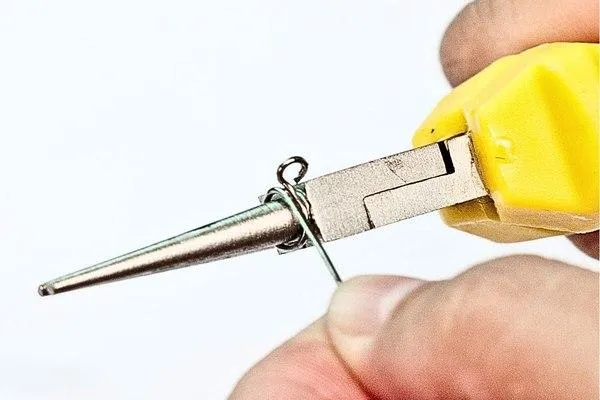
Take your side cutter pliers and snip off any excess wire beyond the loops. This gives your earrings a professional finish.
Keep the wire still while trimming and double-check for sharp edges.
.
Step 9
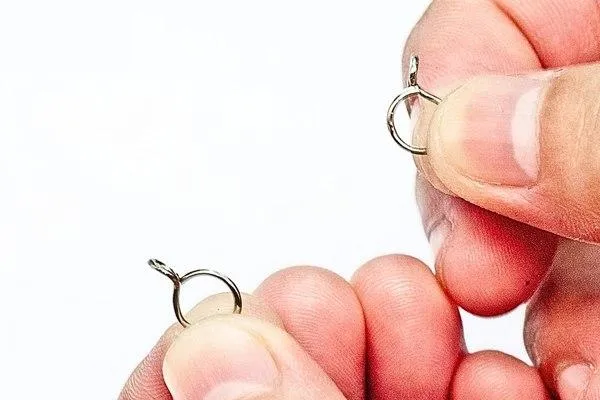
Your earring wires should now function as jump rings with two loops each.
Test their flexibility by slightly opening and closing the loops to ensure they’re strong enough to hold the clamshell securely. Both rings should be identical for balance.
.
Step 10
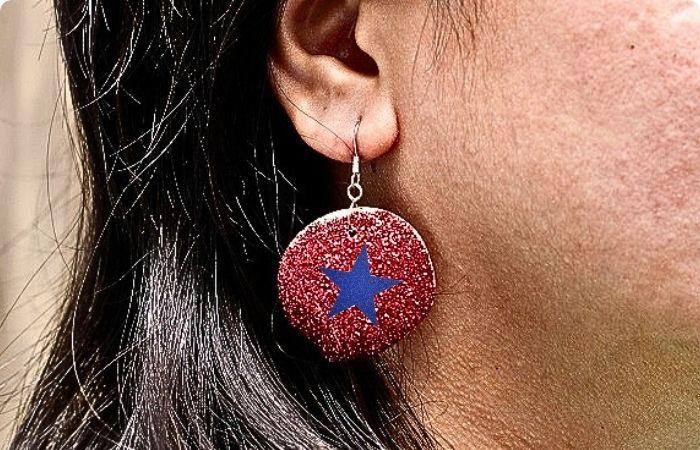
Carefully insert a jump ring into the hole at the top of each clamshell.
Once the shell is secured, hot glue a few silver stars onto the front of the clamshell for extra sparkle.
The stars complement the red glitter beautifully, creating a patriotic, elegant design..
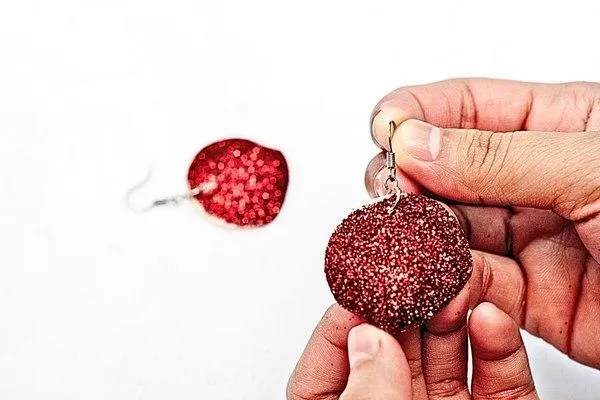
Step 11
Finally, connect each earring hook to the smaller loop of the jump ring.
Adjust any uneven parts with pliers and ensure the hooks are properly aligned.
Attach the blue stars with hot glue.
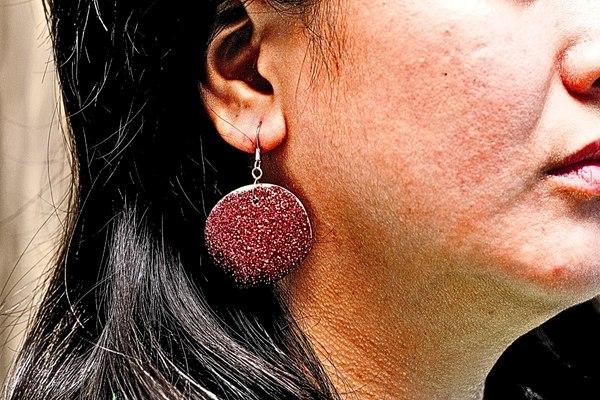
Once everything is securely fastened, your earrings are done—and they’re ready to wear!
.

Your DIY wreath is ready! Hang it on your front door, mantel, or any spot that needs a holiday touch.
Final Thoughts
This eco-friendly wreath is a wonderful way to repurpose old newspapers while adding charm to your holiday decor. The steps are simple, allowing both adults and kids to enjoy the crafting process.
Whether you display it outdoors or indoors, your handmade wreath is sure to brighten your holidays. Get creative, have fun crafting, and happy holidays!Making Star Spangled Earrings is a fun and creative way for kids to express their patriotic spirit while celebrating Independence Day. They’ll love choosing colors, designing patterns, and showing off their dazzling creations!
Fun fact: July 4th became a federal holiday in 1870, and now it’s a day filled with fireworks, crafts, and family fun.
Check out our other Fourth of July craft articles for even more ways to light up the holiday!
More Craft Ideas
Kid Craft
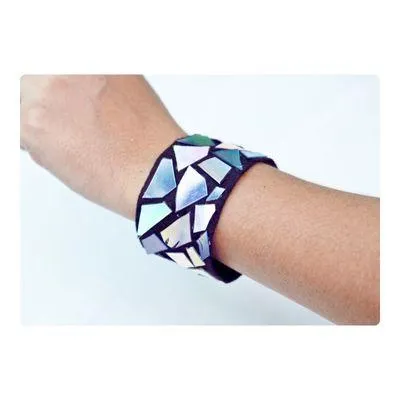
How To Make A DVD Bracelet
Kid Crafts For Every Child
Toddler Crafts
Preschool Crafts
School Crafts

Teen Crafts
Kid Crafts For In and Outdoors

Indoor Crafts
Outdoor Crafts

Educational Crafts
Kid Crafts For Every Season
Spring Crafts

Summer Crafts

Fall Crafts

Winter Crafts
Kid Crafts For Every Holiday

Valentine's Day Crafts
St Patrick's Day Crafts

Easter Crafts
Mother's Day Crafts

Father's Day Crafts

Fourth Of July Crafts

Halloween Crafts

Thanksgiving Crafts