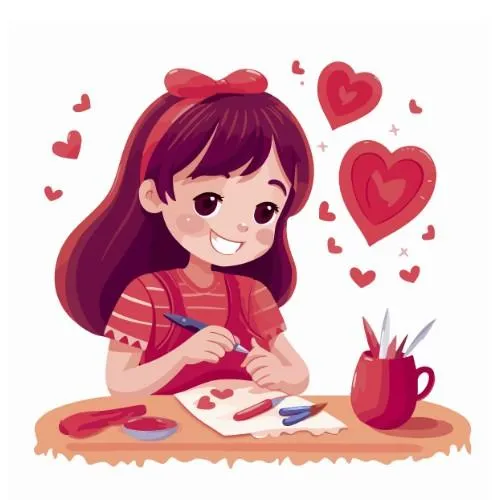
How To Make A Sweet Heart Box
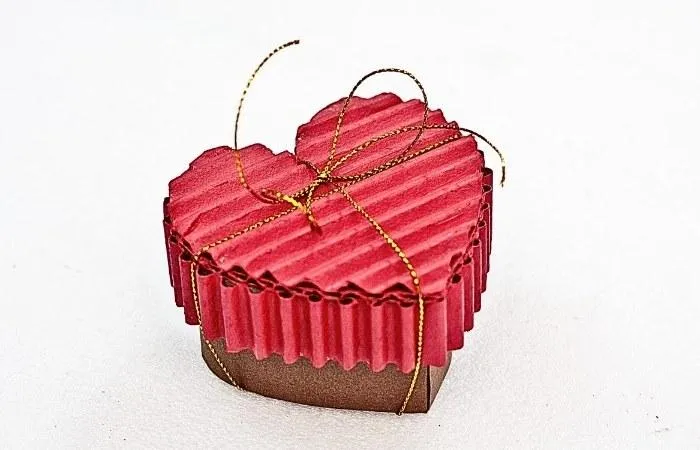
This Valentine's Day, your kids can show love with a special, handmade gift box! Making a heart-shaped gift box out of cardboard and a few other simple materials is not only fun, but it also adds a personal touch to your present.
Perfect for storing sweets, small trinkets, or a heartfelt note, this DIY project is sure to impress your loved one. Let's dive into the steps to craft this token of affection!
Step 1
Gather the following material:
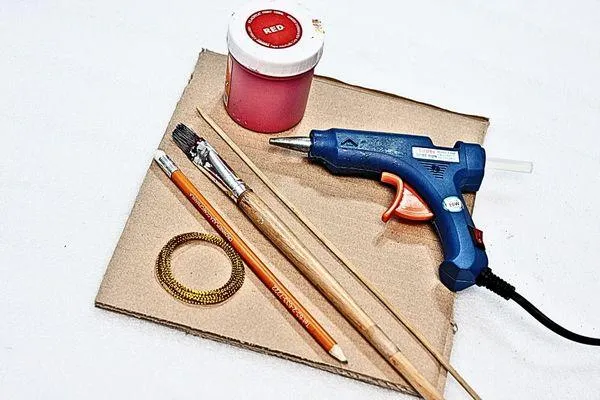
I have included a list of available craft supplies for your convenience.
Here's some stuff
If you click on any link, I will receive a small commission at no cost to you.
Step 2
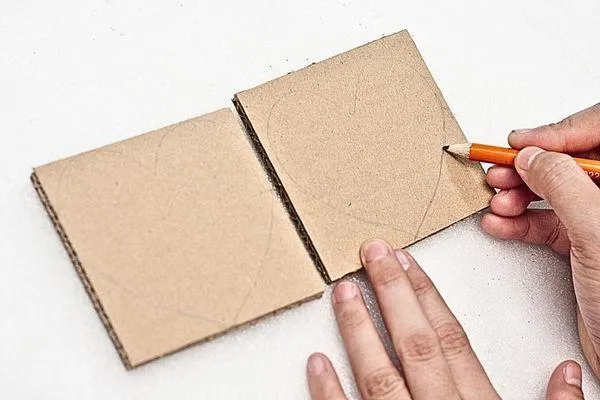
Start by cutting two square pieces from the cardboard. Then, draw a heart on each square—the bigger heart will form the bottom part of the box, and the smaller will be the top cover. Use your pencil to sketch smoothly and evenly.
Step 3
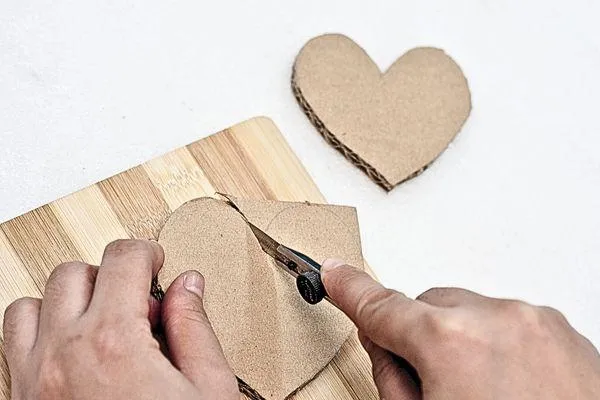
With a sharp cutter, carefully cut out the heart shapes. Make sure your cuts are clean and follow the lines closely to keep the heart shapes perfect. Always cut away from yourself for safety..
Step 4
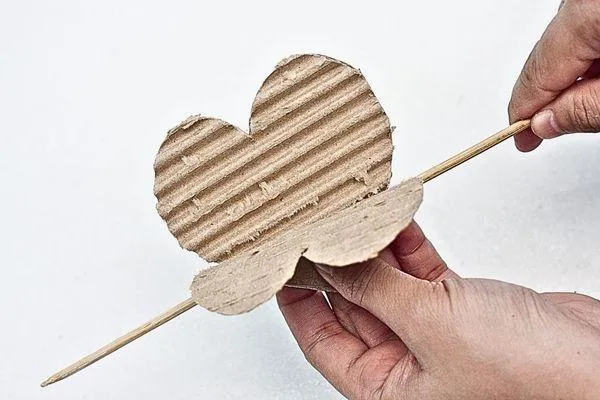
To give texture to the bigger heart, use the wooden skewer to corrugate it. Push the skewer through the cardboard's side openings and gently pull up, removing one layer to create a corrugated effect. Be gentle to avoid tearing the cardboard..
Step 5
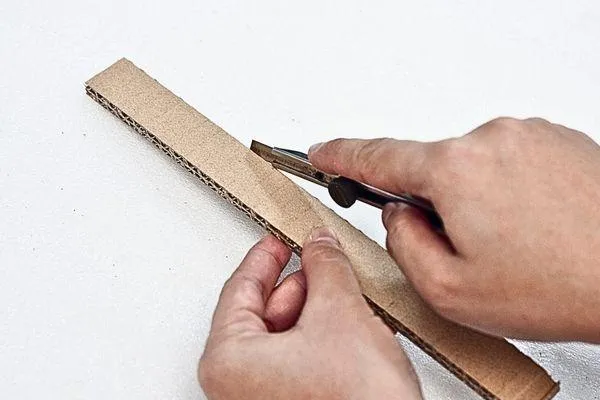
Cut a cardboard strip about 2 centimeters wide and roughly a foot long. This strip will form the sides of your box, so measure it to fit around your larger heart..
Step 6
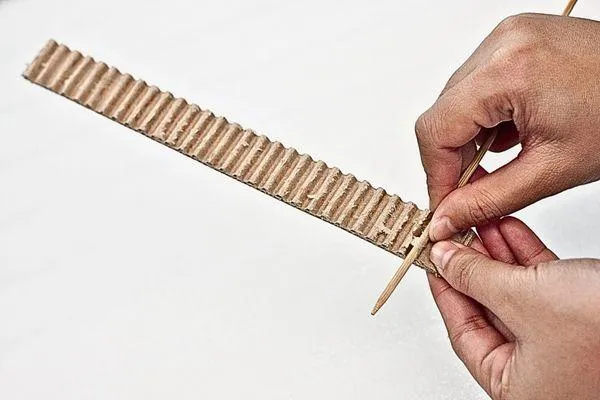
Using the same method as the hearts, corrugate the long strip. This adds a matching texture and makes bending the strip easier when attaching it to the heart..
Step 7
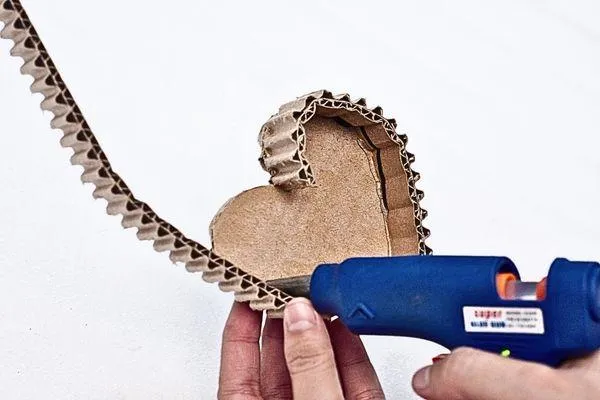
Apply hot glue along the edge of the bigger heart and carefully place the corrugated strip along the contour, starting at one side for a smooth application. Be patient and ensure it adheres securely.
Step 8
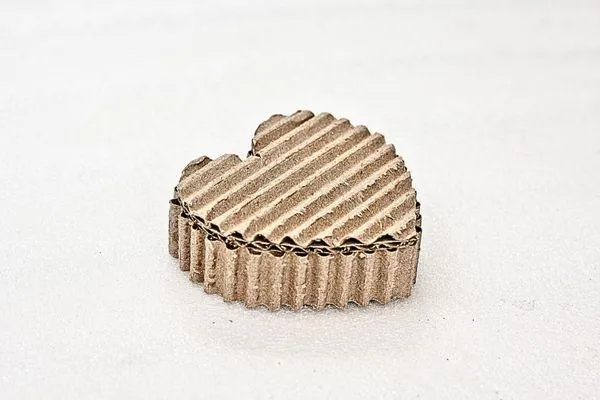
Allow the glued piece to dry for about an hour. By then, the strip should be firmly attached, creating a raised edge around the heart.
Step 9
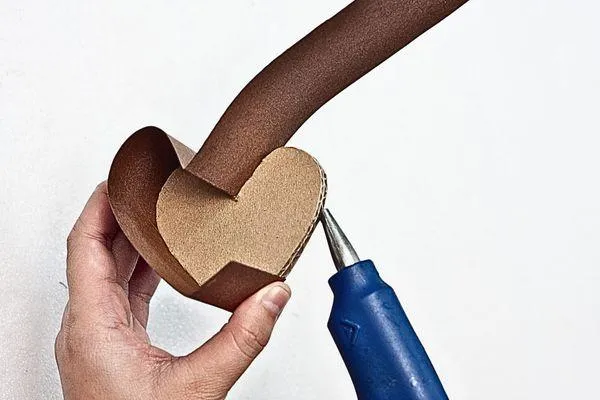
Cut a strip of brown construction board about 3 to 4 centimeters wide and a foot long. This will form the sides of the smaller heart. Glue it along the edge, ensuring it fits snugly.
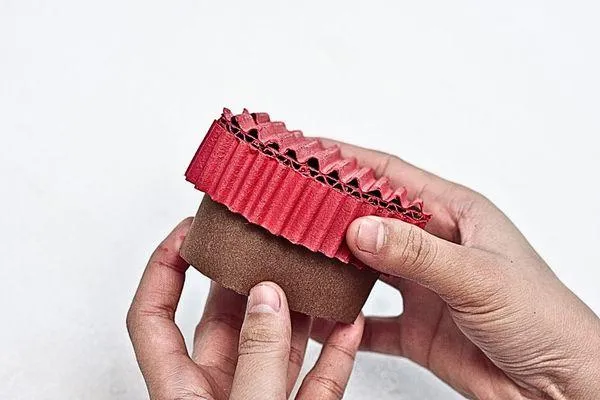
Step 10
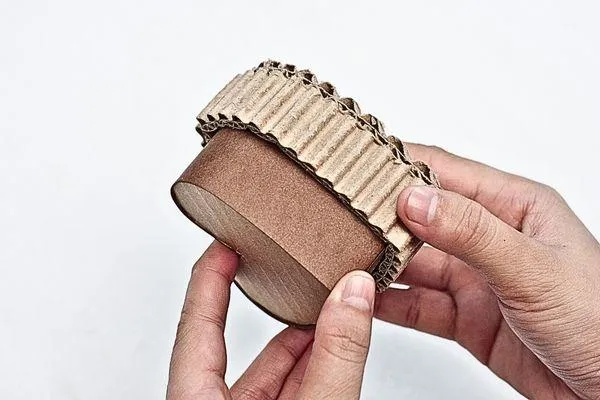
Now, try placing the corrugated cover onto the smaller heart to see how they fit together. You might need to trim the edges slightly for a perfect fit.
Step 11
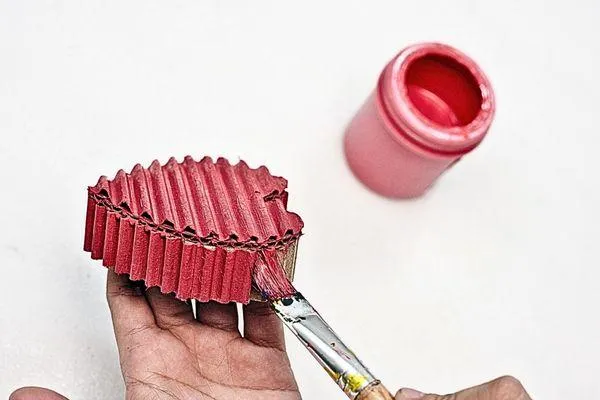
Use red acrylic paint to color the corrugated cover, giving it a vibrant and festive look. Paint carefully, and let it dry completely for an hour or two.
Step 12
Once the paint is dry and the pieces fit together nicely, you can place your gift inside the box. Whether it's candy, jewelry, or a sweet note, it will be wrapped with love!.
Step 13
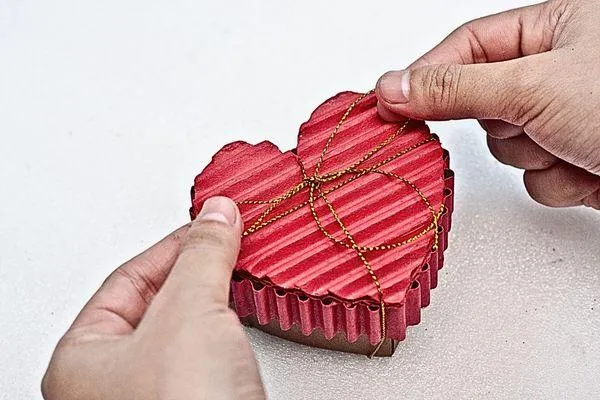
Tie the box with a length of golden metallic thread, fashioning it into a beautiful bow on top. This shimmering detail adds an extra layer of charm.
Step 14

Congratulations, your handmade heart box is ready! Filled with your chosen gift and wrapped in love, it's now time to gift it to your special someone..
Final Thoughts
Valentine crafts for kids are all about love, creativity, and a little bit of fun! A Heart Box is the perfect project to bring those elements together.
This simple yet charming craft gives kids the chance to design their very own box to hold tiny treasures. It’s a wonderful way to celebrate the holiday while encouraging creativity.
Dive into our collection of related articles for more heartwarming crafts and inspire a season filled with love and crafty adventures!
More Craft Ideas
Kid Craft
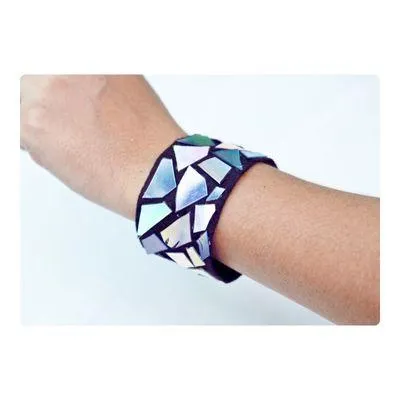
How To Make A DVD Bracelet
Kid Crafts For Every Child
Toddler Crafts
Preschool Crafts
School Crafts
Teen Crafts
Kid Crafts For In and Outdoors

Indoor Crafts
Outdoor Crafts

Educational Crafts
Kid Crafts For Every Season
Spring Crafts

Summer Crafts

Fall Crafts

Winter Crafts
Kid Crafts For Every Holiday
Valentine's Day Crafts
St Patrick's Day Crafts

Easter Crafts
Mother's Day Crafts

Father's Day Crafts

Fourth Of July Crafts
Halloween Crafts
Thanksgiving Crafts